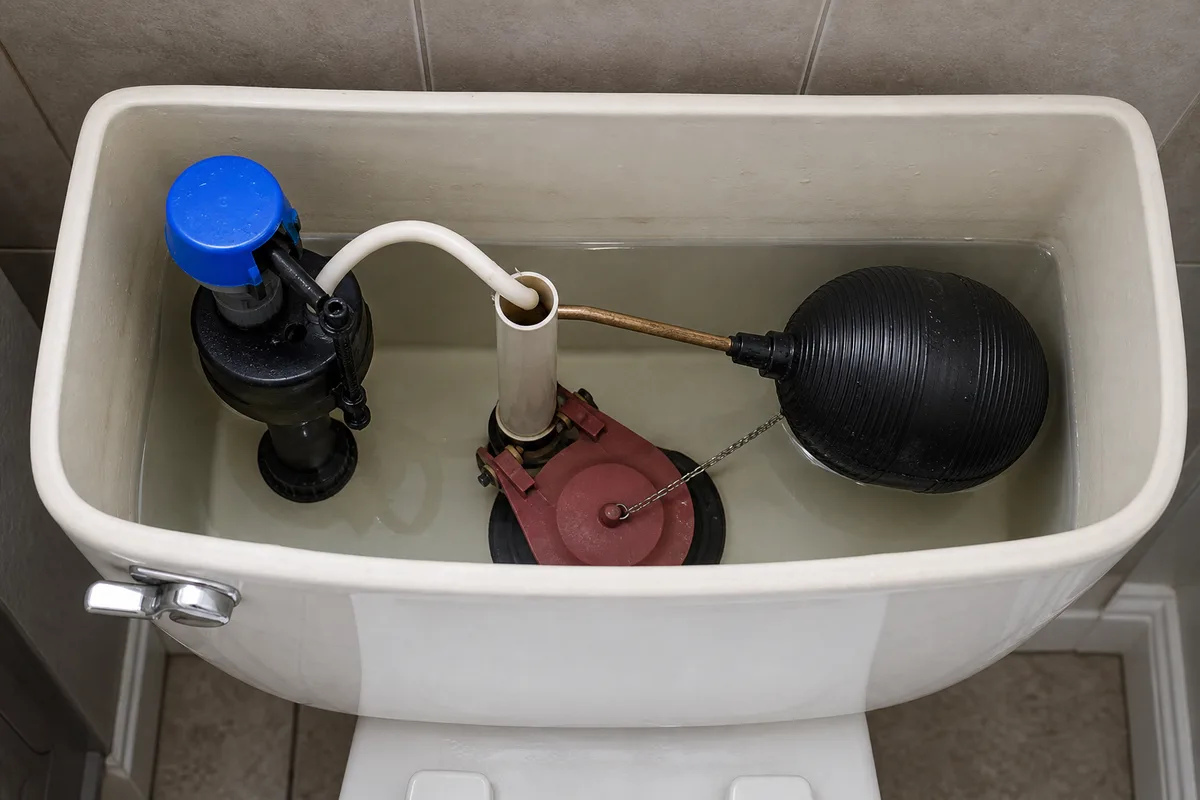
A running toilet is one of those repairs that feels mysterious until you lift the lid once, and then it never does again. The whole mechanism sits in plain view inside the tank, there are only three or four moving parts, and the thing that has failed is almost always a rubber piece worth a few dollars. The reason people call a plumber for it is not that the fix is hard. It is that nobody ever showed them the order to check things in, so they poke at it, guess, and end up buying a part that was never the problem.
This guide is that order. I work from the cheapest and most likely cause down to the least, because the flapper at the bottom of the tank is the culprit the majority of the time, and it is also the easiest and least expensive thing to swap. There is no reason to buy a whole rebuild kit before you have confirmed which single part is leaking. I will also show you the one simple test that tells you exactly where the water is escaping before you spend a cent, so you are fixing the actual failure instead of throwing parts at the tank and hoping.
The sound that starts the search
The tell is usually your ears before it is anything else. A toilet that has finished its job goes silent. When one refuses to settle, you get a faint, intermittent hiss, or the sound of the tank topping itself up every few minutes with nobody near it. That periodic refill, which always seems to save its best work for the quietest hour of the night, is the classic signature of a running toilet. It is not the dramatic full-on rush of a stuck flush. It is a phantom refill, a short trickle-and-fill that repeats on its own, and that pattern is the single best clue that water is slowly escaping the tank somewhere.
The reason to take the quiet version seriously is that it is not a small waste. A toilet leaking silently can lose a couple hundred gallons of water a day without ever overflowing or making an obvious mess, because the water is simply slipping from the tank into the bowl and down the drain where you never see it. That is the part that surprises people: nothing looks wrong, the floor is dry, and yet the meter is running the whole time. The phantom refill you hear at night is the tell, not a full-on run, and catching it early is the difference between a few-dollar part and a bill you notice.
So the first move is not to grab a tool. It is to lift the tank lid off, set it flat and out of the way somewhere it cannot get knocked to the floor, since the porcelain lid is heavy and cracks if it lands on a hard edge. With the lid off, you are looking at the whole system: a tall valve on one side where the water comes in, a float riding on the water, a rubber flap at the very bottom over the big opening, and a chain connecting that flap up to the flush lever. Spend thirty seconds just watching it. Sometimes the problem announces itself immediately, water visibly dribbling over the top of the tall central tube, or a flapper sitting cocked and not sealing. Most of the time it is subtler than that, which is why the next step is a structured triage rather than a stare.
A 10-minute triage, cheapest first
Before you touch a single part, walk through a quick ordered check. The whole point of going in this sequence is to avoid the common mistake of replacing the expensive component when a fifty-cent adjustment would have done it. Give yourself ten unhurried minutes and go in this order.
First, look at the water level in the tank relative to the tall central tube, called the overflow tube. That tube is an open pipe standing up in the middle of the tank, and its top is the tank's built-in safety drain. If the water in the tank is sitting right at the rim of that tube or spilling into it, water is running down the overflow continuously and the fill valve never gets the signal to shut off. That is a level problem, and it is the fastest thing to rule in or out just by looking.
Second, look at the flapper, the rubber seal at the bottom over the large flush opening. Is it lying flat and centered over the opening, or is it warped, tilted, or held slightly ajar by a chain that is too short or tangled? A flapper that cannot seat fully lets tank water seep into the bowl constantly.
Third, jiggle the flush handle and watch what the chain and flapper do. A surprising number of running toilets are caused by nothing more than a chain kinked under the flapper or a handle arm binding so the flapper never drops all the way closed.
Fourth, if none of those is obviously wrong, the fill valve itself, the tall unit the water enters through, may be failing to shut off cleanly. That is the least common of the everyday causes and the one you confirm last.
This ordering matters because it moves from the near-free fixes to the paid ones. A tangled chain costs nothing. A water-level adjustment costs nothing. A flapper is a few dollars. A fill valve is the priciest of the group and the most involved to change. Work top to bottom on likelihood and cost, and most of the time you will have your answer before you reach the last step. There is a companion piece on the broader logic of tackling household repairs cheapest-cause-first in the guide to essential home repair skills every homeowner should learn, and a running toilet is a textbook example of that approach.
The dye test to find the leak
The single most useful thing you can do before buying any part is a dye test, because it tells you for certain whether water is leaking past the flapper or whether the problem lives higher up in the fill and float system. It costs nothing but a few drops of food coloring and ten minutes of waiting, and it removes all the guesswork.
Here is how it goes. With the tank full and the toilet sitting undisturbed, put several drops of food coloring into the tank water, enough to tint it a clear color, and stir it gently with your hand or a stick so the color spreads through the tank. Then walk away and do not flush. Leave it completely alone for at least ten minutes, and longer if you can spare it. When you come back, look into the bowl, not the tank, which is the one instruction people somehow manage to get backward.
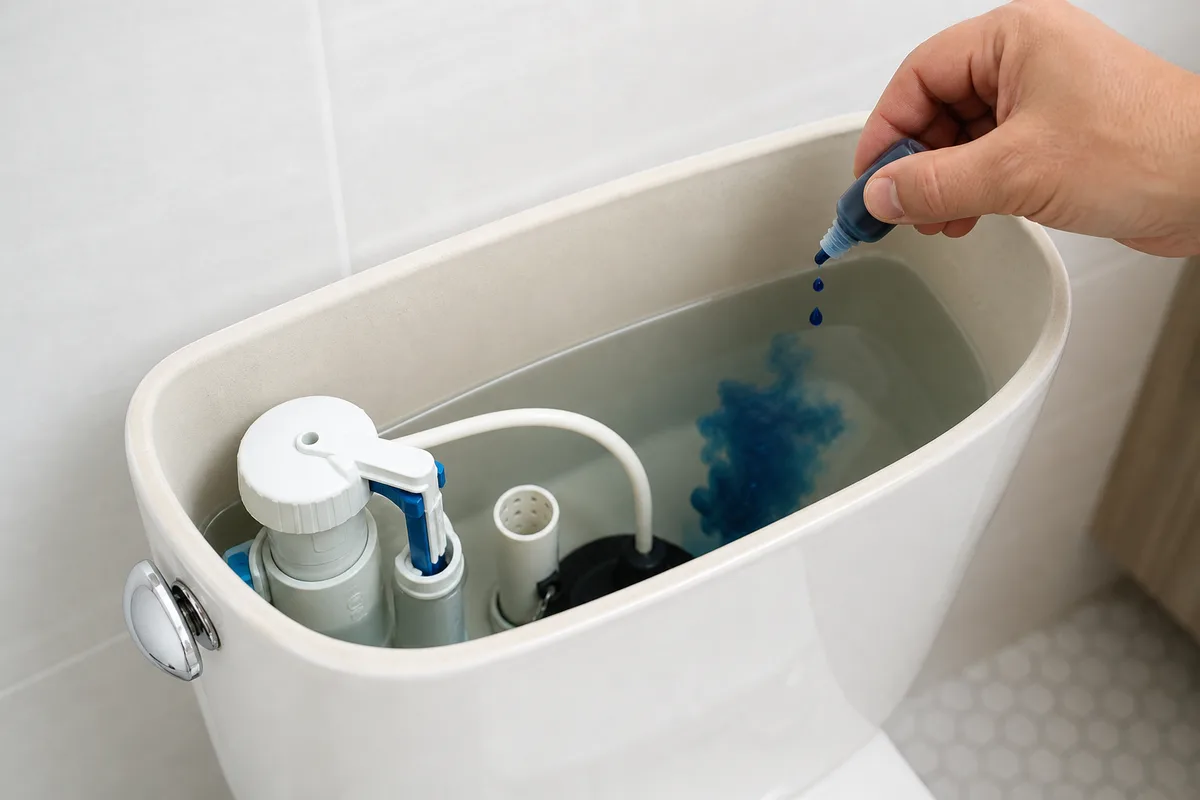 Adding food coloring to a toilet tank to test for a flapper leak
If colored water has appeared in the bowl within about ten minutes without anyone flushing, you have confirmed a flapper leak: tank water is sneaking past the bottom seal into the bowl, and that is your running toilet. This is the result you get most of the time, because a worn flapper is behind the majority of running toilets, and the dye test is how you prove it before spending money. If the bowl water is still clear after the wait, the flapper is sealing fine and your problem is higher up, in the water level or the fill valve, which sends you to a different fix entirely.
The reason this test is worth the ten minutes is that the flapper and the fill valve fail in ways that sound identical from across the room. Both produce that intermittent refill. Without the dye test, people replace a perfectly good flapper because the toilet was running, and then it keeps running because the real fault was the level or the valve. A few drops of coloring settles the argument. One practical note: do not leave the dye sitting for hours in a colored tank, especially a colored dye that could stain, and give the bowl a flush to clear the color once you have your answer.
Cause 1: a worn or misaligned flapper
Assume the dye test pointed at the flapper, because statistically it usually does. The flapper is the flexible rubber or silicone seal that covers the big opening at the bottom of the tank. When you flush, the lever lifts it, the tank dumps into the bowl, and then the flapper drops back down and seals so the tank can refill and hold. Over a few years, that rubber hardens, warps, or develops a slimy film, and it stops sealing cleanly against its seat. Tank water then trickles past it into the bowl around the clock, which triggers the fill valve to top the tank up again and again, and there is your run.
Start by ruling out the free version of the fix. Sometimes the flapper is fine but it is being held ajar. Check that the chain from the flush lever is not so short that it holds the flapper up, and not so long that a loop of it slips under the flapper and props it open. Also feel the seat, the rim of the opening the flapper closes against, for grit or mineral buildup, and wipe it clean with a rag. A pebble of mineral scale on the seat will hold a good flapper open just as effectively as a bad flapper.
If the flapper itself is the problem, replacing it is genuinely a few-minute job. Shut off the water at the fixture stop, the small valve on the wall behind the toilet, by turning it clockwise until it stops. Flush to empty the tank, and mop the last bit of water from the bottom with a sponge or rag so you can work dry. The old flapper unhooks from two small ears or pegs on the base of the overflow tube and unclips from the chain. Take it with you when you buy the replacement so you can match the style, because flappers come in a couple of sizes and a few mounting shapes, and standing in the store trying to picture yours from memory is a coin flip you will usually lose. A close match seats far better than a guess.
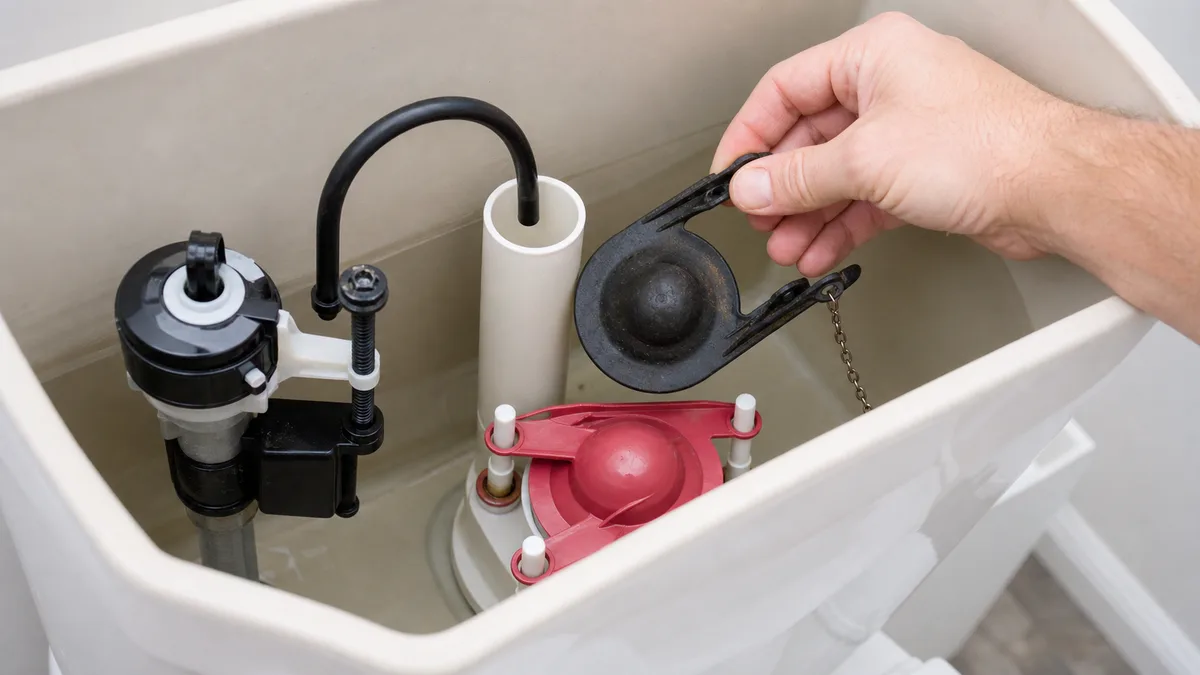 Replacing a worn flapper inside a toilet tank
Hook the new flapper onto the same pegs, clip the chain to the lever with just a tiny bit of slack, turn the water back on, and let the tank fill. Then run the dye test again to confirm the bowl stays clear. That final check is worth the ten minutes, because it verifies the fix rather than assuming it. The honest limit here: if the seat itself is pitted or corroded rather than just dirty, a new flapper may still weep, and that is a case where a repair kit for the seat or a call to a plumber becomes reasonable. But a clean seat and a matched flapper solve the large majority of these.
Cause 2: chain, float, and water level
If the dye test came back clear, the flapper is sealing and the trouble is in how high the tank fills and how the parts are adjusted. This is the group of causes that costs nothing to fix, because you are adjusting existing parts rather than replacing them, and it is worth being methodical here.
Begin with the water level, because it is the most common member of this group. Look at where the water settles relative to the top of the overflow tube. The rule I set every tank to is simple: the water should rest about an inch below the top of the overflow tube. If it is set higher than that, water runs constantly over the lip of the overflow and down into the bowl, and the fill valve can never sense a full tank, so it never fully shuts off. A level set too high runs endlessly down the overflow and never stops, and it is one of the most frequently overlooked causes precisely because nothing looks broken, the parts are all fine, they are just adjusted wrong. It is the plumbing version of a gadget that only needed turning off and back on.
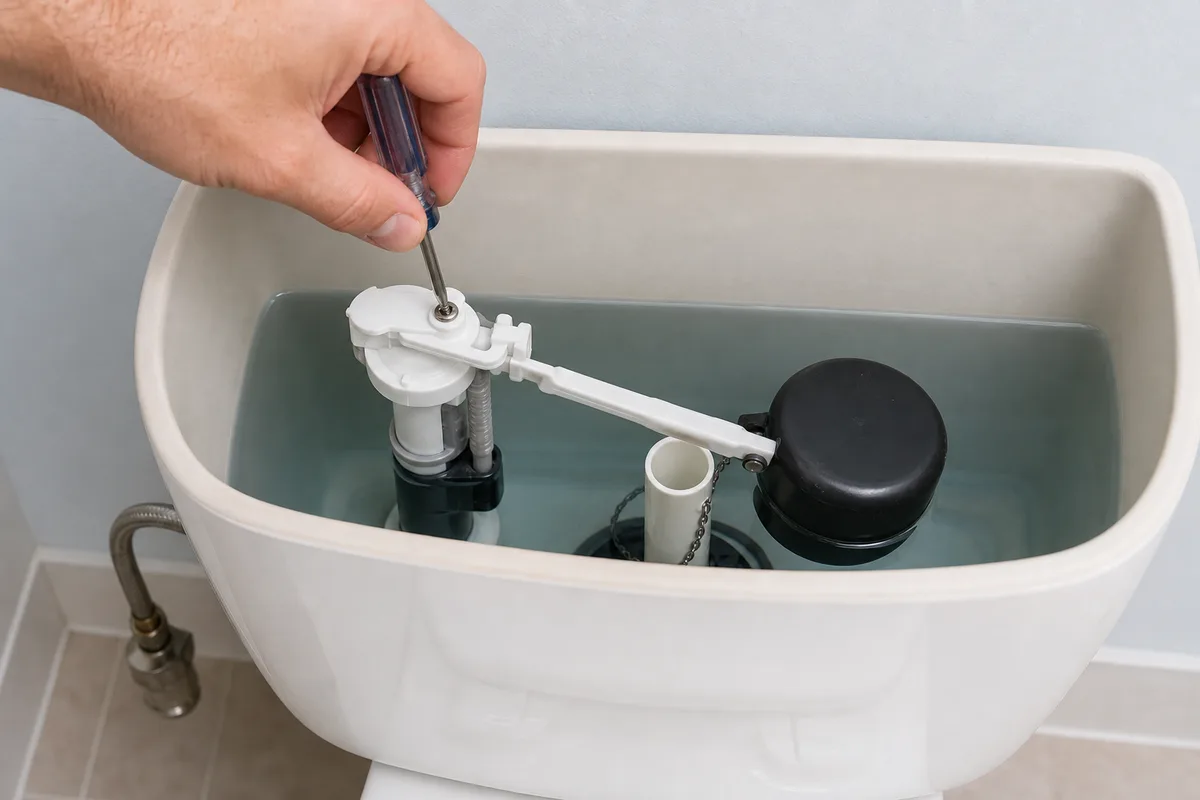 Adjusting the float to set the water level in a toilet tank
How you lower the level depends on the float style. Older toilets use a ball float on the end of a horizontal arm; you lower the water by gently bending that arm down or, on newer versions of it, turning an adjustment screw where the arm meets the valve. Most modern toilets use a cup-style float that rides up and down the fill valve body; you lower it by pinching a clip or turning a screw on a vertical rod so the whole float sits lower. Make a small adjustment, flush, let it refill, and see where it settles. Sneak up on the mark about an inch below the overflow rather than overshooting.
Next, the chain and lever. The chain wants just a little slack when the flapper is closed, enough that it does not hold the flapper up, but not so much that a loop can fall under the flapper and wedge it open. If the chain is rusty, kinked, or so long it tangles, shortening it a link or two or replacing it is trivial. Also check the flush handle and its arm inside the tank; if the handle sticks in a partly-pressed position, the arm holds the flapper up and the tank runs. A drop of the right lubricant on a stiff handle mechanism, or snugging a loose mounting nut, often frees it. These are the free fixes, and they resolve a real share of running toilets that people wrongly blame on the flapper or the valve.
Cause 3: the fill valve
If the flapper seals, the chain is right, and the water still creeps above your inch-below-the-overflow mark no matter how you set the float, the fill valve itself is failing to shut off. The fill valve is the tall assembly the supply water enters through; its job is to open when the tank drops, refill it, and then close cleanly at the set level. When its internal seal wears out, it never fully closes, so it keeps dribbling water in, the level rises to the overflow, and the tank runs down the tube continuously. This is the least common of the three everyday causes, which is exactly why you confirm it last, after the free adjustments and the cheap flapper have been ruled out.
You can usually confirm a bad fill valve by watching and listening. With the tank full and quiet, if you can see or hear water still trickling into the tank or down the overflow even though the float is at or below the correct level, the valve is not sealing. Another quick check: lift the float fully by hand. If the water stops the instant you lift it and the valve was letting water in at the set height, the valve seal is worn and cannot hold at that height on its own.
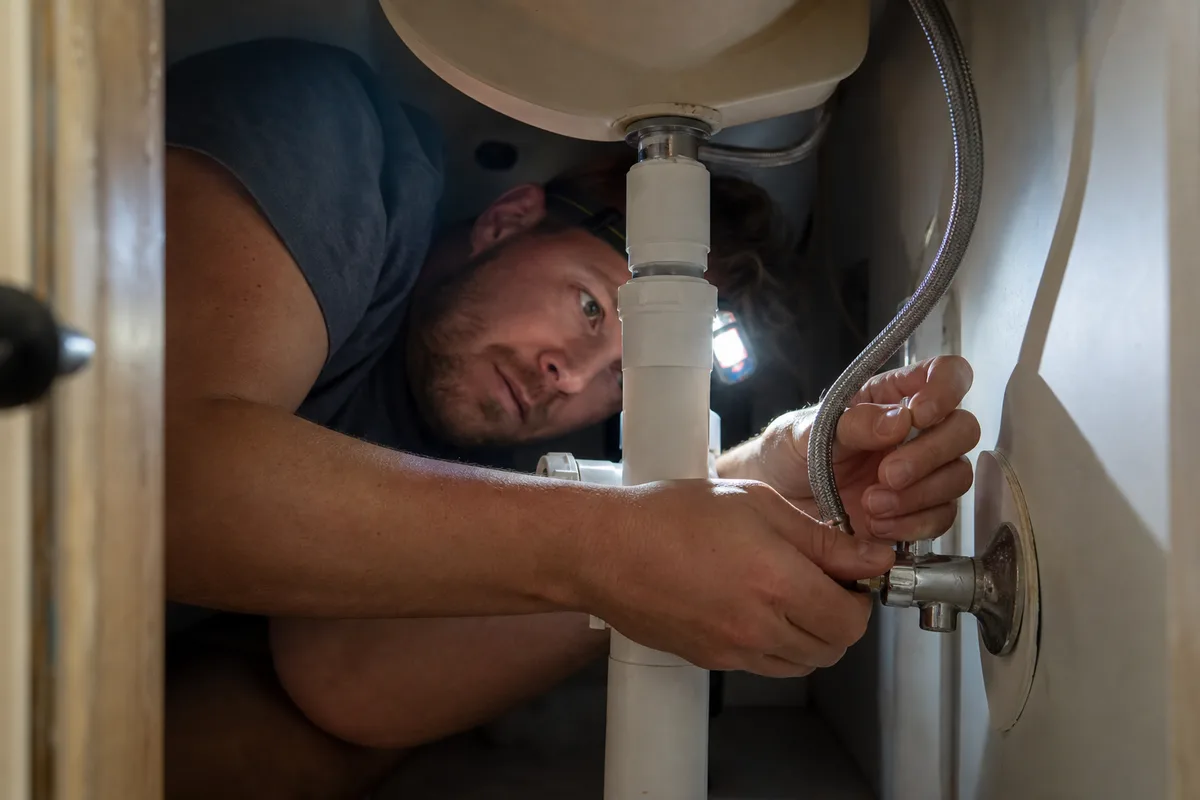
Replacing a fill valve is more involved than a flapper but still firmly within a homeowner's reach and does not require a full tank teardown. Shut off the fixture stop, flush, and sponge the tank dry as before. There is also a supply line connecting the stop to the bottom of the fill valve under the tank, and a lock nut holding the valve to the tank; you loosen the supply line and that nut to free the old valve, then set the new one in, tighten the nut to hold it, and reconnect the supply line. Modern fill valves are height-adjustable, so you set the new one to the tank and dial the level to that inch below the overflow.
One rule matters a great deal on the connections under the tank, and beginners break it constantly by overtightening: snug the fittings by hand until they stop, then give no more than a light quarter turn with a wrench. Cranking a plastic nut or a supply line hard does not make it more leakproof; it splits the washer or cracks the plastic and creates a fresh leak that was not there before, which is a frustrating way to turn one problem into two. The same restraint applies to the lock nut holding the valve to the porcelain, which only needs to be firm, not forced. That hand-tight-plus-a-quarter discipline is the single most useful habit across all small plumbing work, and it comes up again in the guide to replacing a leaky faucet, where the same fittings and the same temptation to overtighten show up.
Replacing parts without a full rebuild
There is a persistent idea that a running toilet means buying an all-in-one rebuild kit and swapping every part in the tank at once. Most of the time that is more work, more money, and more chance of a new leak than the problem calls for. The whole reason to run the triage and the dye test is so you replace only the one part that failed. A flapper is a flapper; a fill valve is a fill valve; a chain is a chain. Diagnosed correctly, you buy the single component and leave the rest alone, since parts that are sealing and working owe you nothing.
There are situations where a broader replacement is the sensible call, and it is worth naming them honestly. If the toilet is genuinely old and you are already in there because the flapper failed, and you can see the fill valve is corroded or brittle, doing both at once can save a second trip. If more than one part is visibly degraded, or if you replaced the flapper and the toilet still leaks because the seat is pitted, then stepping up to a fuller repair makes sense. But that is a judgment you make after diagnosing, not the default you reach for first. Replacing a working part to fix a broken one is how a simple job grows an extra leak.
Whatever you replace, three practices keep the job clean. Take the old part to buy the new one so you match the size and style rather than guessing across a wall of similar-looking pieces. Shut the fixture stop and sponge the tank dry before you start, because working in standing water hides what you are doing and drips everywhere. And after any part swap, refill the tank and run the dye test one more time to confirm the bowl stays clear, so you leave knowing it is actually fixed rather than hoping. Understanding how the tank, the supply stop, and the household water line all connect makes these swaps far less intimidating, and the walkthrough of how your home's systems fit together lays out that plumbing path so you can see where the toilet sits in the bigger picture.
Preventing the next silent leak
Once it is fixed, a little attention keeps it from creeping back, because the failure modes here are gradual and quiet by nature. The rubber parts wear slowly, the leak starts as a whisper, and by the time you notice the phantom refill again it has been costing you for weeks. A few simple habits catch it early and stretch the life of the parts.
The first habit is the periodic dye test. Two or three times a year, drop a bit of food coloring in the tank, leave it ten minutes without flushing, and check the bowl. It takes almost no effort and it catches a flapper that is just starting to seep long before the sound gets loud enough to notice at night. Since a silent leak can quietly waste a couple hundred gallons a day, this small check pays for itself many times over.
The second is to keep the tank chemistry gentle. Drop-in tablets that sit in the tank and promise to clean or color the water, especially the ones with harsh cleaning agents, are hard on rubber. They accelerate the exact hardening and warping that ruins a flapper, so a flapper that might have lasted years can fail in a fraction of that time. That blue water is quietly working against you the whole while it sits there looking tidy. If you want the bowl cleaned, cleaning the bowl directly rather than parking a chemical in the tank is easier on the seals. It is a small choice that meaningfully extends how long your parts last.
The third is to listen. You already know the sound now: that intermittent, on-its-own refill, loudest when the house is quiet. When you hear it start, lift the lid and run the triage again from the top. Catching a leak in its first days keeps it a five-minute adjustment instead of weeks of quiet waste. And keep the fixture stop behind the toilet exercised, turning it off and on once in a while, so that when you do need to shut the water for a repair, the valve actually turns instead of being seized from years of sitting.
None of this is complicated, and that is the real takeaway. A running toilet has a small, visible set of causes, and worked in order from the cheapest up, with a dye test to confirm before you buy, it is one of the most satisfying repairs a homeowner can own. You lift the lid, you look, you test, you swap the one part that failed, and the house goes quiet again.