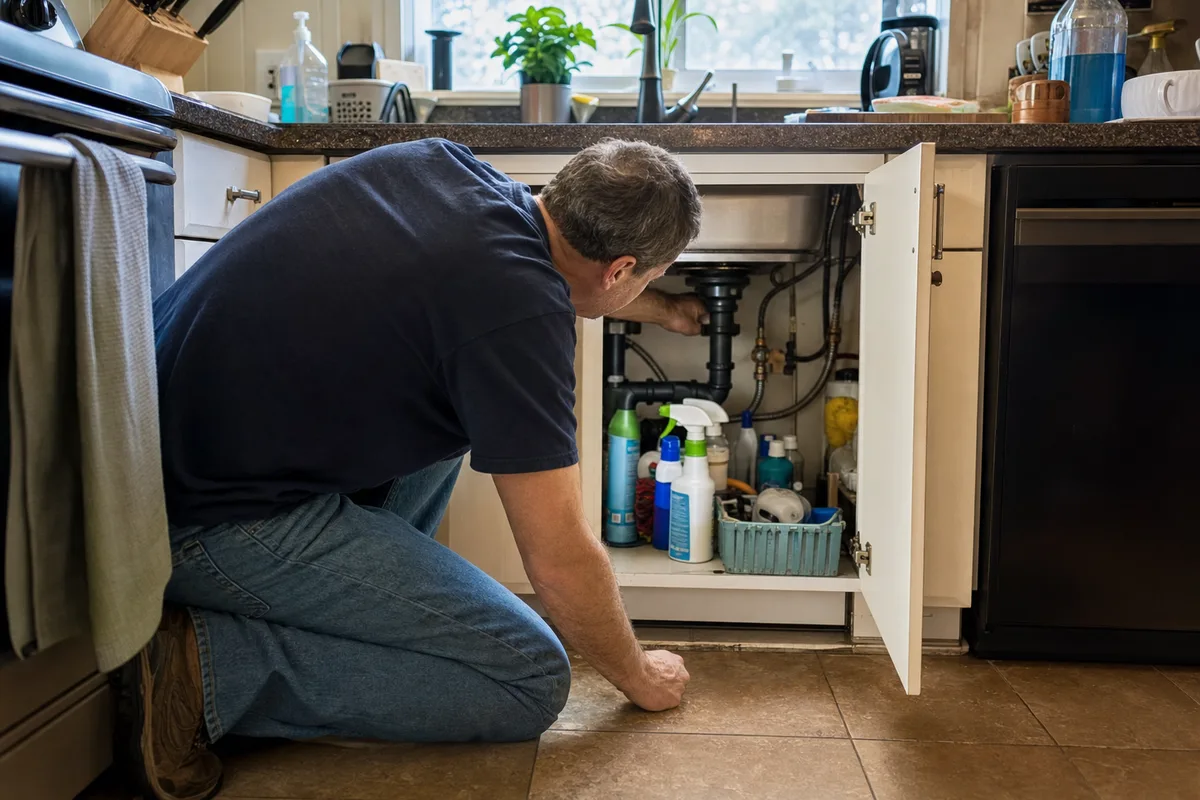
Most homeowners I have talked to do not need more tools. They need a shorter list of things to actually learn. The handyman gets called for the same five or six small jobs over and over, and each visit costs more than the repair itself. A running toilet, a loose cabinet hinge, a supply line weeping under the sink, a curtain rod that pulled out of the drywall: none of these are hard. They only feel hard the first time, because nobody ever showed you the order to do them in or where the traps are.
This article is that order. It is not a catalog of every repair a house can throw at you. It is a prioritized shortlist, ranked by how often the skill saves a service call weighed against how easy it is to get wrong. I will be honest about the line where doing it yourself stops making sense, because knowing when to stop is a skill too, and it is the one that keeps a cheap job from turning into an expensive one.
What "home repair" actually covers, and what it doesn't
The word "repair" gets stretched to cover three different activities, and confusing them is where people either over-hire or over-reach. Sorting them out first makes the rest of the decisions easier.
Maintenance is the work you do so a thing does not break: cleaning the dryer vent, swapping a furnace filter, resealing a bathtub edge, tightening the screws on a door hinge before the door starts to sag. It is scheduled, low-stakes, and almost always within reach of a beginner. Skip it long enough and it turns into the next category.
Repair is putting a broken or failing thing back to working order without changing what it is: replacing the flapper in a toilet, patching a hole in drywall, swapping a worn faucet cartridge, re-anchoring a shelf that tore out of the wall. This is the sweet spot for a homeowner. The parts are cheap, the failure is contained to one fixture, and if you take it apart carefully you can almost always put it back.
Remodel changes what the thing is: moving a wall, running new circuits, relocating plumbing, cutting into structure. This is a different world with permits, inspections, and consequences that outlast you. Some of it is DIY-able with real study; most of it, for a new-ish homeowner, is not the place to start.
The useful mental habit is to ask before every job: am I restoring something to how it worked, or am I changing the system? Restoring is usually yours to try. Changing the system is where you slow down and ask whether you actually know what is behind that wall.
Where DIY reasonably stops
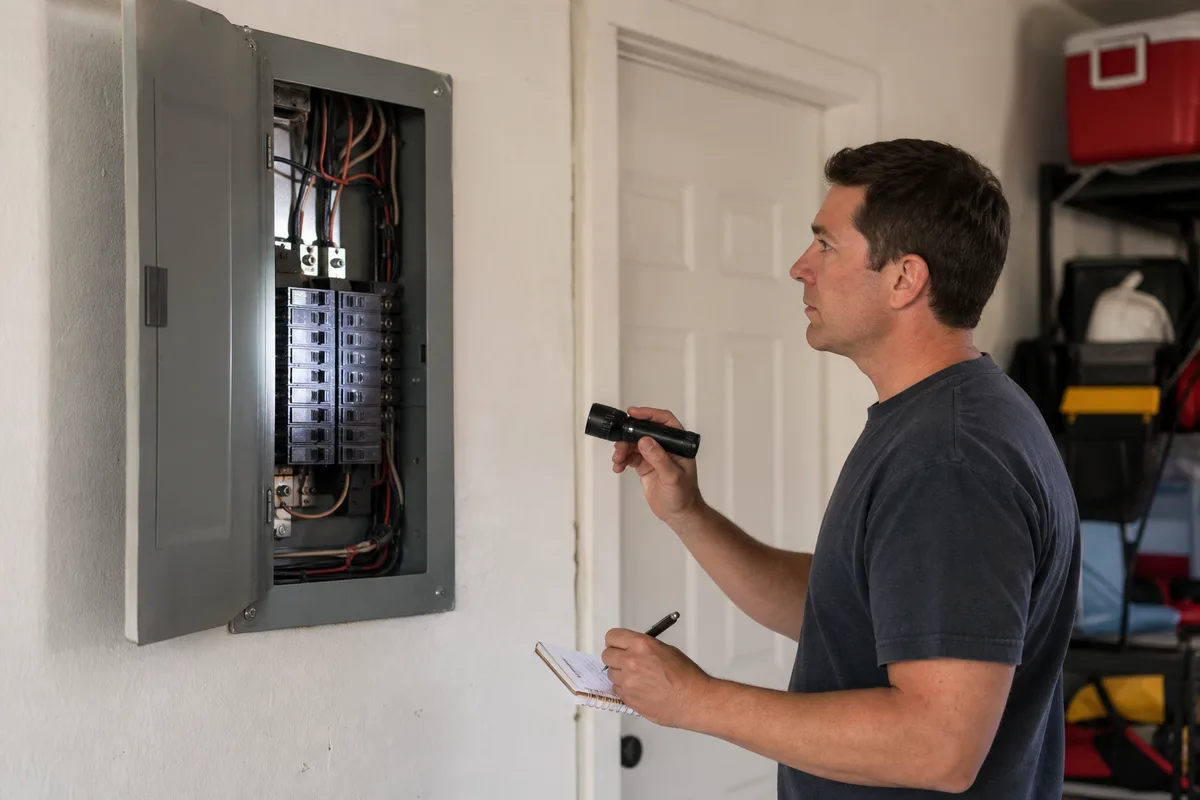
There are a few hard lines I do not cross, and I would tell any homeowner the same. Anything involving gas (a line, a water heater's gas valve, a furnace burner) I leave to a licensed person, full stop. A small gas leak is not a job you learn on. The main electrical panel is the second line: I will change a switch or an outlet on a circuit I have shut off and tested dead, but I do not open the main panel or touch the incoming service. And anything structural (cutting a joist, removing a wall that might be load-bearing, anything holding up the house) gets a professional's eyes before a single cut.
Everything in between those lines is fair game, and it is a bigger territory than most people think. The point of drawing the lines clearly is that once you know where they are, you can work confidently on your side of them instead of being nervous about all of it. If you want to understand what is actually behind those lines (how your circuits, water, and locks work), the companion piece on how a house is put together walks through the systems so the repairs make more sense.
The five skills that come up most often
If I rank home repairs by how frequently they come up in an ordinary occupied house, glamour has nothing to do with it. Nobody photographs a re-seated toilet flapper. But that is the repair a family of four might need every couple of years, while the impressive stuff, the kind that looks good finished, comes up once a decade.
Here is the shortlist, ordered the way I would teach it:
- Turning things off safely. Water, power, and gas. This is not really a repair; it is the skill that makes every other repair safe and reversible. It comes first because without it, a small job can flood a cabinet or put you across a live wire.
- Patching and finishing a wall. Holes from anchors, dings from furniture, the crack over a doorway. High frequency, very low risk, and it teaches patience.
- Stopping a leak or a running fixture. Toilets and faucets. The most common call a plumber gets for the smallest actual problem.
- Fixing doors, drawers, and hinges. Sticking, squeaking, sagging, not latching. Constant, cheap, and satisfying.
- Basic fastening and mounting. Getting a screw to hold in the right anchor so shelves, rods, and TVs stay up. The skill that quietly underpins half the others.
That ordering is deliberate. Each skill builds a little confidence and a little tool familiarity before the next one asks for more. The rest of this article takes them one at a time.
Skill 1: turning things off safely (water, power, gas)
This is the first skill because it is the one that turns every other job from scary to routine. If you can make the water, the electricity, or the gas stop reaching the thing you are working on, you have removed almost all of the risk.
Start with water, because water jobs are the most common and the shutoffs are the most forgiving. Under most sinks and behind most toilets there is a small oval or football-shaped valve on the supply line, called a fixture stop. Turn it clockwise until it stops and the water to that one fixture is off. This takes about 10 seconds once you know where it is, and not knowing where it is turns a 20-minute faucet job into a flooded cabinet and a frantic search for the main. So before you ever need it, go around the house on a quiet afternoon and find every stop: both under each sink, behind each toilet, and at the washing machine. Turn each one off and back on. Old stops seize up, and a seized valve keeps that news to itself until the exact moment you need it, so you would much rather find the stuck one now than mid-leak. If a fixture has no stop, or the stop is frozen, your fallback is the main water shutoff, usually where the water line enters the house, near the front foundation wall or by the water heater. Know where that is too.
Power is next. Every circuit in the house traces back to a breaker in the panel, and the honest truth is that panels are often labeled badly or not at all. Do not trust the label. When you are working on an outlet or switch, flip the breaker you think controls it, then confirm the circuit is actually dead with a non-contact voltage tester, a pen-shaped tool that beeps or lights near live wires without touching them. Cost is small and it is the single tool I would not skip. Test it on a known-live outlet first to confirm the tester works, then test your dead circuit. Two checks, every time. If you want the reasoning behind why a breaker maps to some outlets and not others, the deeper walkthrough of how home circuits are wired explains it.
Gas gets its own paragraph so I can say clearly: the only gas skill I recommend a homeowner learn is how to shut it off in an emergency. There is usually a valve at the meter that turns a quarter turn with a wrench, and each gas appliance has its own shutoff. Learn where those are. Beyond turning it off, gas work belongs to a licensed professional. That is not caution for its own sake; it is the right call.
Skill 2: patching and finishing a wall
Wall patching is the best beginner repair because the stakes are almost zero and the technique transfers everywhere. Get it wrong and you sand it back and try again; nothing floods, nothing sparks.
A small hole, the kind an anchor or a doorknob leaves, takes lightweight spackle, a flexible putty knife, and a bit of fine sandpaper. The move that separates a clean patch from an obvious one is doing it in thin coats. Beginners load the knife and try to fill the hole in one pass, which sinks and cracks as it dries. Instead, press a thin skim into the hole, let it dry, and it will shrink slightly and leave a shallow dish. Fill that with a second thin coat, feathering the edges wider than the hole. Two or three thin coats beats one thick one every time. Sand lightly between coats, and finish by feathering the last coat 6 to 8 inches past the damage so the transition disappears under paint.
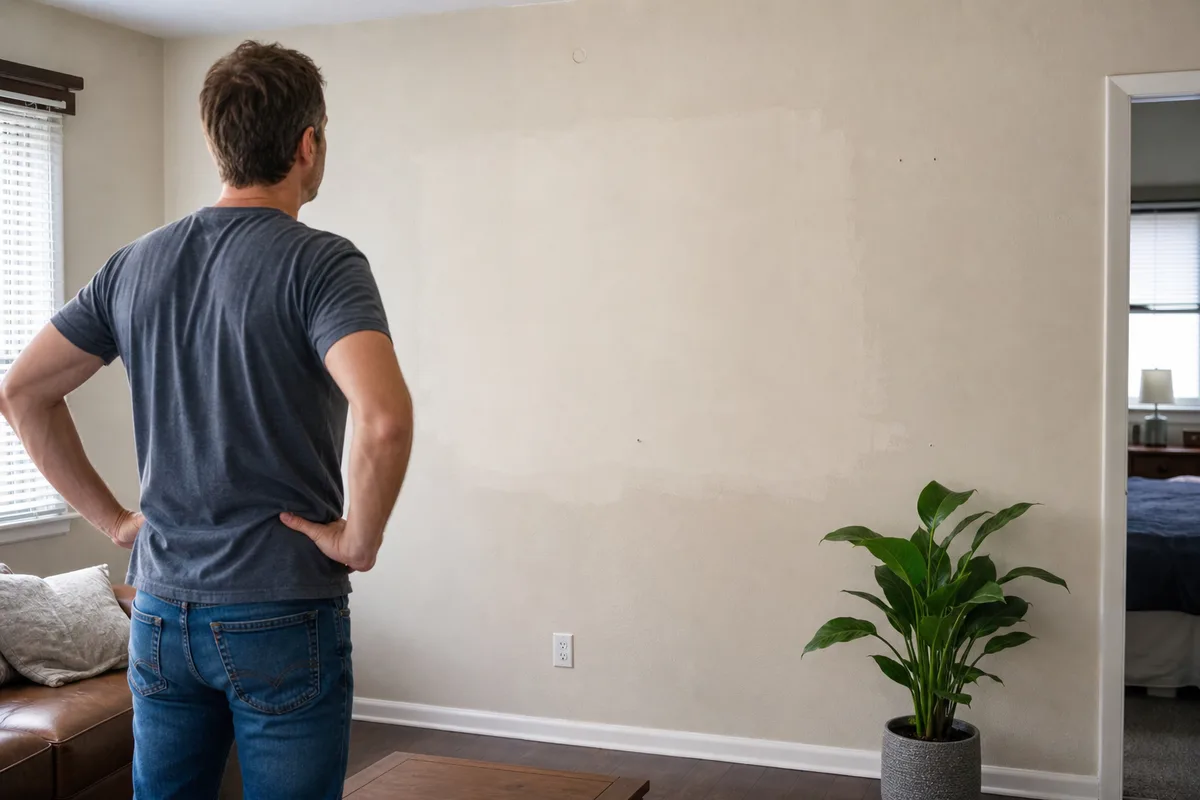 A repaired and repainted patch on an interior wall
For a hole bigger than a coin, say a fist-sized one from a doorknob or a moving mishap, spackle alone will sag into the cavity. That is where a self-adhesive mesh patch or a cut piece of drywall backing comes in, and the technique changes enough that it deserves its own walkthrough. The step-by-step on patching a drywall hole covers the bridging methods for the sizes that spackle can't handle on its own.
The two honest limits: matching paint sheen and texture is harder than the patch itself, and a spot-touch that looked invisible at noon has a way of announcing itself the moment afternoon light rakes across the wall. So on a visible wall, plan to repaint the whole wall corner to corner rather than spot-touching. And a patch will not fix a hole that keeps reappearing because a door handle hits the same spot. For that you also need a doorstop, which is a fastening job, not a patching one.
Skill 3: stopping a leak or a running fixture
Plumbers get called for toilets and faucets more than almost anything, and the underlying problem is usually a worn rubber part that costs a few dollars. Learning to swap those parts is the highest-value skill on this list in pure money terms.
A running toilet is the classic. That faint hiss or the tank that refills itself every few minutes is almost always a flapper that no longer seals, or a fill valve that does not shut off. The repair is: shut the fixture stop behind the toilet, flush to empty the tank, and look. If the flapper is warped, brittle, or slimy, it is a cheap universal part that clips into place in a couple of minutes. If the water runs into the overflow tube instead, the fill valve needs adjusting or replacing. None of it requires more than your hands and maybe a screwdriver. I have laid out the full diagnosis-to-fix sequence in the guide to fixing a running toilet, because the two failure points have different fixes and it helps to see which is which.
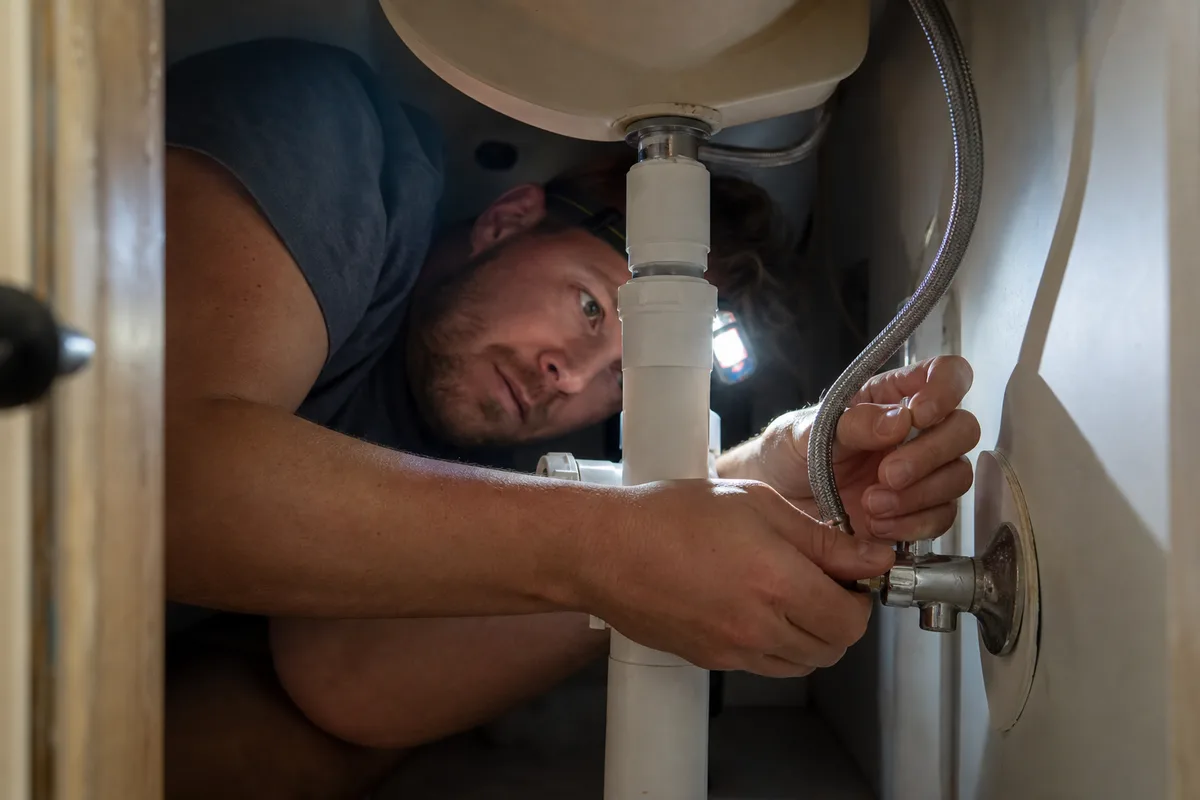
A weeping faucet or supply line is the other common one, and it introduces the single most important rule in home plumbing, which I will put in bold because beginners break it constantly: hand-tight plus a quarter turn. When you reconnect a braided supply line or thread on a fitting, snug it by hand until it stops, then give it no more than a quarter turn with a wrench. That is it.
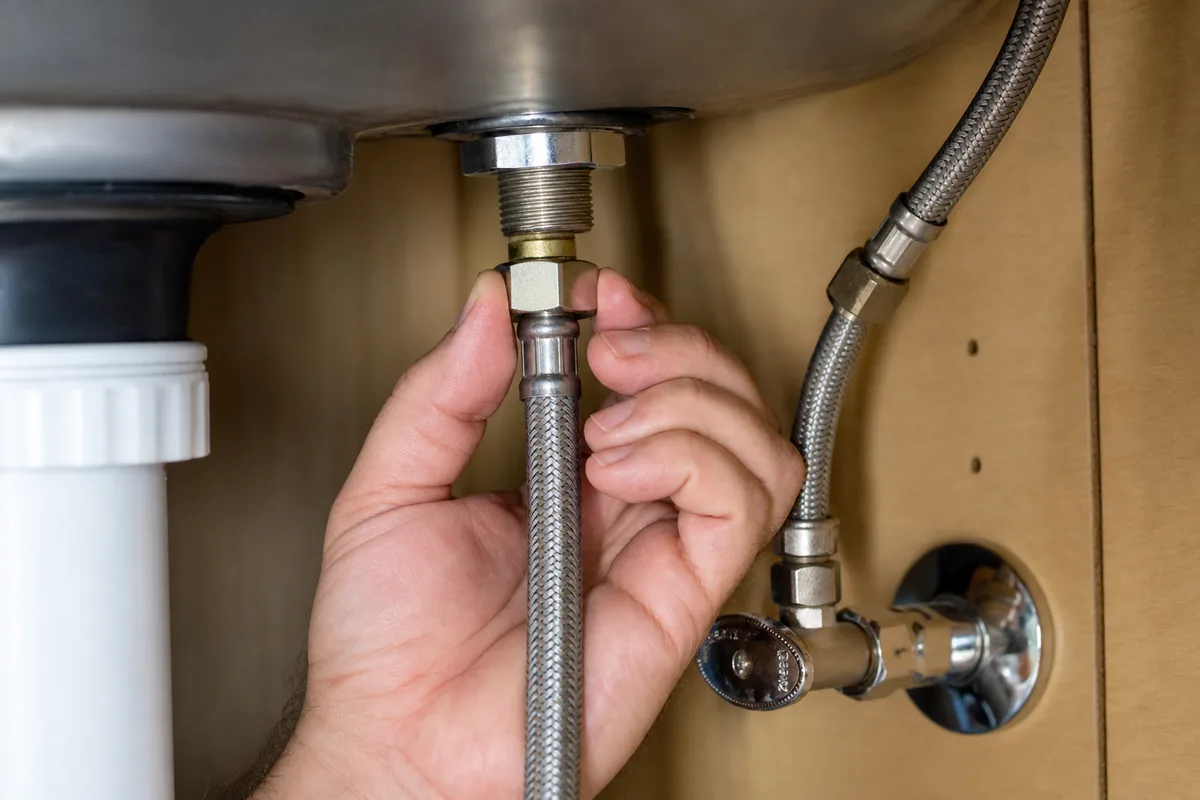 Hand tightening a braided water supply line by hand under a sink
The instinct is to crank it hard because "tighter must be more leakproof," and it is the one place where trusting your gut leads you straight into a second trip to the hardware store. It is the opposite. Overtightening splits the rubber washer, cracks a plastic nut, or strips the threads, and now you have a leak that was not there before, plus a part you have to replace. If a connection weeps at hand-tight-plus-a-quarter, the answer is almost never more force: it is a fresh washer or a bit of thread tape, not a bigger wrench. This same restraint (snug, not cranked) is the mindset that keeps you out of trouble across most of these repairs.
Where this skill stops: a slow drip from a faucet body usually means a worn cartridge, which is still DIY but model-specific, and the full walkthrough on replacing a leaky faucet covers how to match the part to the faucet. And any leak inside a wall, or a supply line that is copper and soldered rather than a screw-on braided line, is a different job. Persistent wet drywall or a musty cabinet means water has been getting somewhere it should not, and that is a call worth making sooner than later.
Skill 4: fixing doors, drawers, and hinges
Doors and drawers move thousands of times a year, so they are always the next thing to go out of adjustment. The repairs are quick, they use tools you already have from the earlier skills, and the results are immediately satisfying, which is why I put them fourth. They are the reward after the plumbing.
A squeaky hinge is 60 seconds of work. Do not spray oil at it; oil drips and attracts grit. Instead, tap the hinge pin up and out partway, wipe it, coat it lightly with a dry lubricant or even a rub of a bar of soap or petroleum jelly, and tap it back. The squeak is gone and it stays gone longer than an oil fix.
A door that will not latch has usually shifted so the latch no longer lines up with the hole in the strike plate. Close the door slowly and watch where the latch hits: if it strikes above or below the hole, the fix is often just tightening the hinge screws, because a sagging door drops the latch. If the top hinge screws spin without biting, a common find, replace one of them with a longer 3-inch screw that reaches past the jamb into the wall framing behind it. That single longer screw pulls the whole door back into square and re-aligns the latch. It is one of those small moves that feels like magic the first time, and slightly smug the second. If it is the deadbolt rather than the passage latch that has stopped lining up, the piece on how door locks and deadbolts work explains the mechanism and the common alignment fixes.
A sticking door that rubs the frame swells and shrinks with the seasons, so before you plane anything off, figure out whether it sticks year-round or only in humid months. Planing a door in July to fit, then watching it rattle loose in January, is a classic over-correction. The gentler first steps (tightening hinges, marking exactly where it rubs, sanding just that spot) solve most sticking without permanent removal. The full set of tricks, including when planing is actually warranted, is in the guide to fixing squeaky and sticking doors.
Drawers that stick usually have a worn or dry slide; a rub of paraffin or a candle on the wooden runner, or a look at whether a roller has come off its track, fixes most of them without new hardware. The judgment call across all of these: if the door or drawer front itself is cracked or the joint has come apart, that is a rebuild, not an adjustment, and worth weighing against replacement.
Skill 5: basic fastening and mounting into the right anchor
This is the skill that quietly holds up half of everything else, literally. Shelves, curtain rods, towel bars, mirrors, a mounted TV: they all fail the same way, by pulling out of the wall, and they all succeed the same way, by being fastened into the right thing.
The core idea is that drywall by itself holds almost no weight. A screw driven straight into drywall will hold a light picture, and then tear out the moment you hang anything with heft on it, taking a chunk of wall with it, which sends you right back to Skill 2. The reliable path is to hit a stud, the vertical wood framing behind the drywall, spaced 16 inches apart in most homes. A magnetic or electronic stud finder locates them; a small confirming pinhole tells you for sure. When you can land a fastener in a stud, do it, because nothing beats screwing into solid wood.
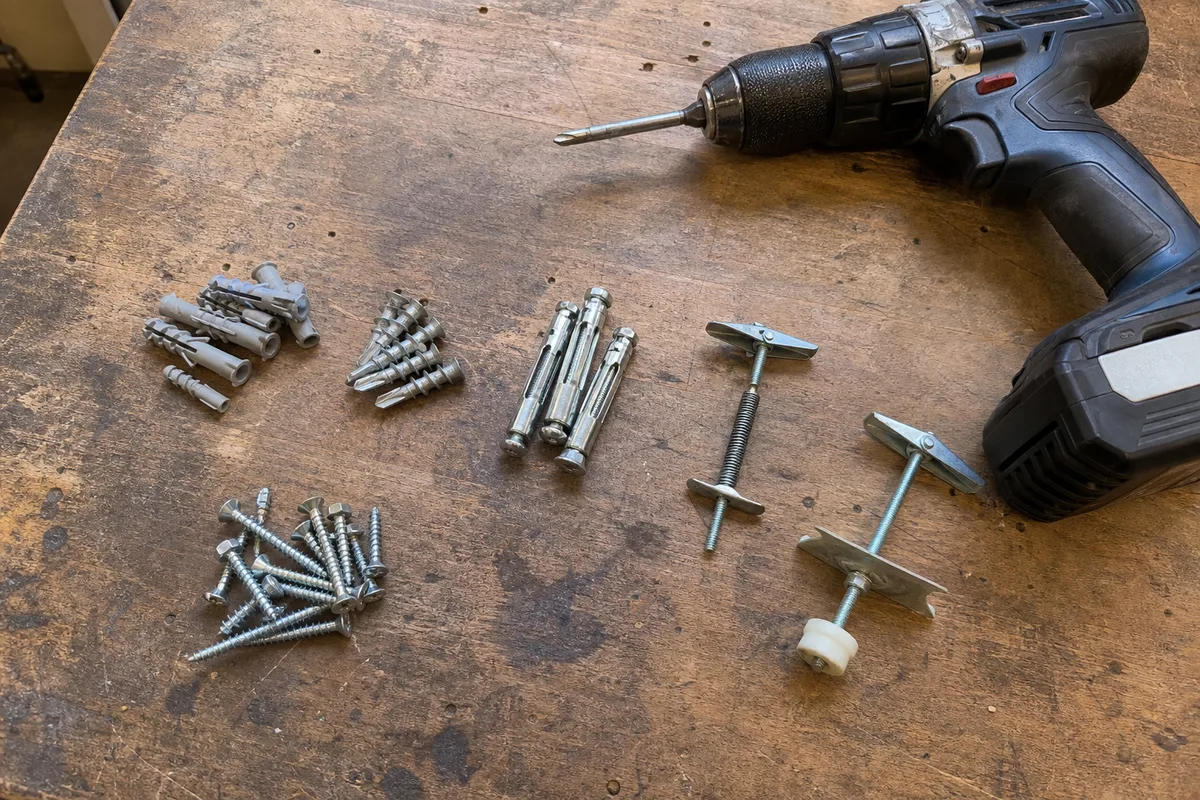
When there is no stud where you need one, which is often, you use a wall anchor matched to the weight. This is where people go wrong: they use the flimsy plastic cone anchors that come in the box for a heavy mirror, and it sags out within a month. For real load, a threaded self-drilling anchor or a toggle bolt spreads the weight across a wider patch of drywall and holds far more. Match the anchor to the job, not to whatever was in the drawer.
The same restraint from the plumbing section applies to screws. Overtightening strips the anchor just like it splits a washer: snug the fastener until it seats, then stop. A stripped anchor spins in place with a cheerful little whir, does nothing, and sends you an inch to the left to start over. Snug, not cranked, one more time.
Where this stops honestly: a genuinely heavy TV or a floating shelf carrying real weight deserves care about exactly what is behind the wall and how the bracket loads it, and mounting into brick, tile, or plaster is a different technique with different bits. But for the everyday rod-and-shelf work, hitting a stud or using the right anchor covers it. If you want the full sorting of anchor types and the reason most mounts fail by pulling out rather than by weight, we go through it in choosing the right wall anchor.
The starter kit: what to own before you own more
You do not need a wall of tools to do everything above. A basic repair kit that handles roughly 80% of small jobs runs about 120 to 180 USD, and if you assemble it thoughtfully, most of it lasts decades. The mistake beginners make is buying a big flashy tool first, the kind that looks impressive on the shelf and gets used twice a year; the tool that actually earns its keep before anything else is a humble one.
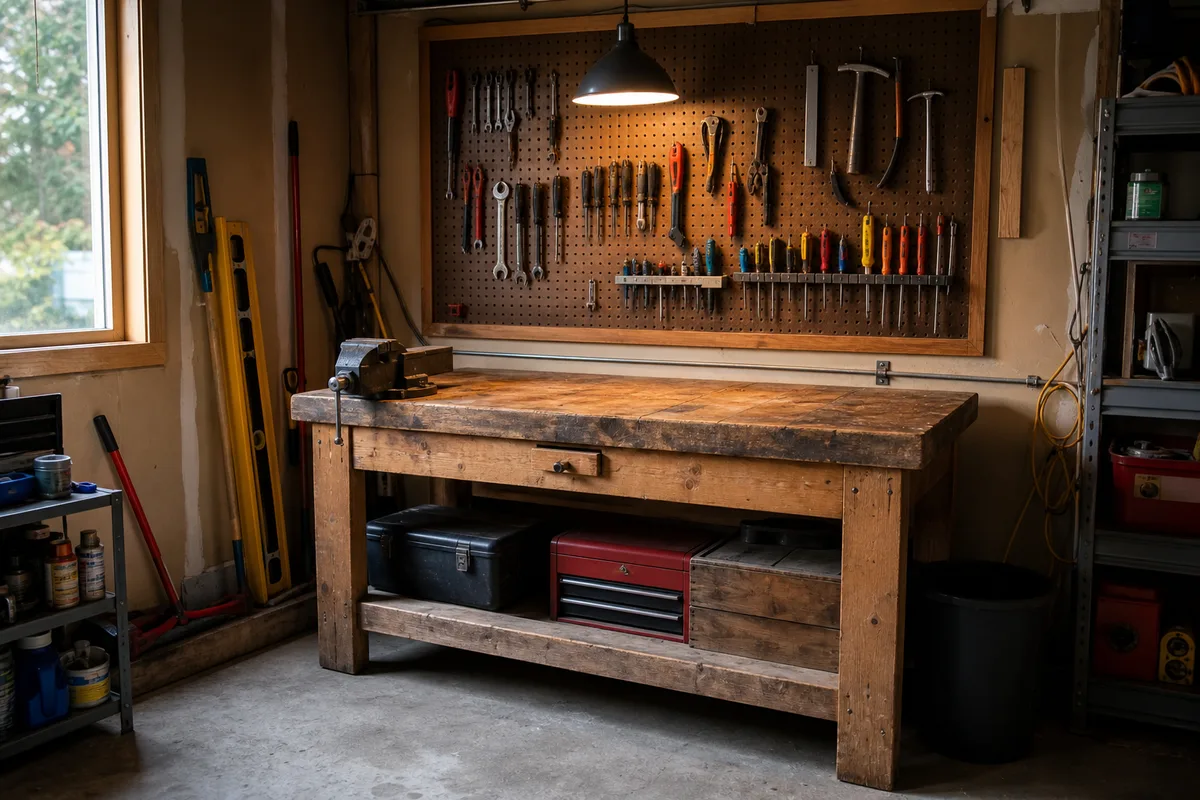
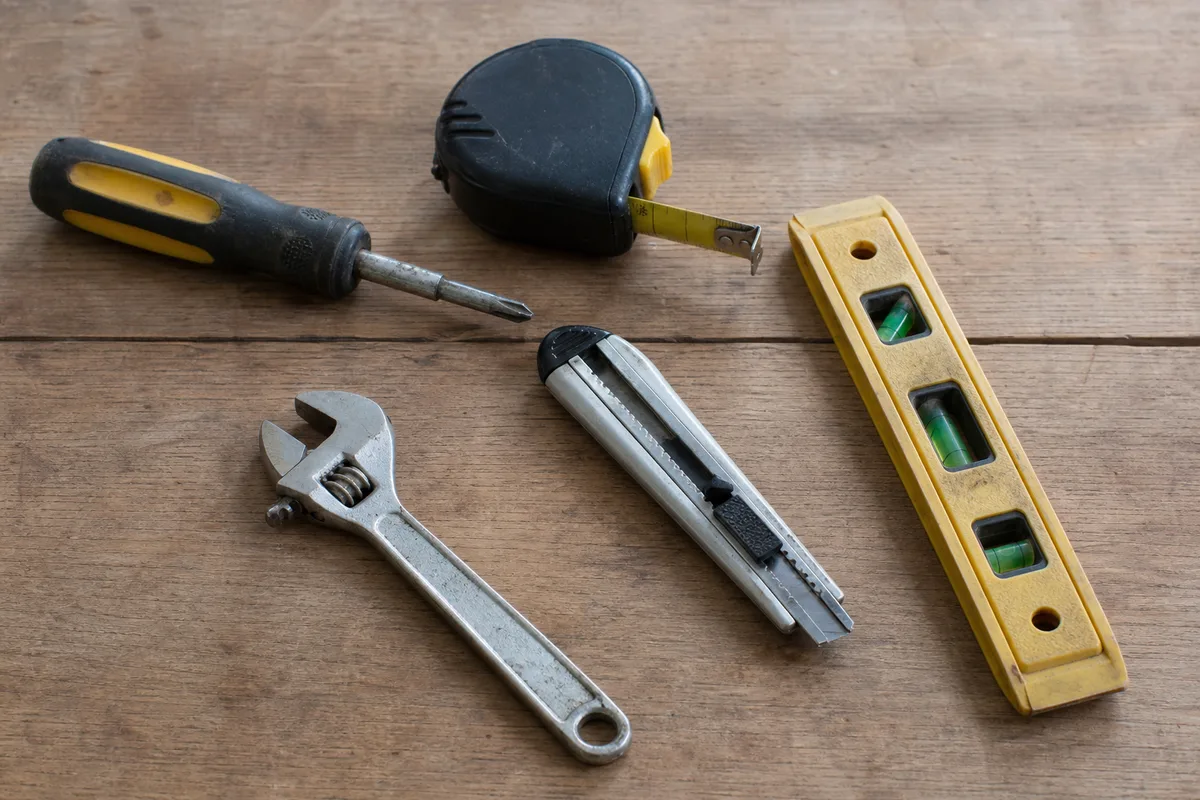 A basic home repair tool kit laid out on a workbench
The single most-used tool in that kit is a 4-in-1 screwdriver, not the drill. It handles both common screw types in both common sizes, it fits where a drill will not, and it gives you the feel for tightening that a drill's clutch hides from you. I reach for it several times for every once I pick up the drill. The drill matters, but it comes second.
A workable starter set, in rough order of how often you will grab it:
- A 4-in-1 screwdriver, plus a small set of precision drivers for cabinet hardware and electronics.
- A 25-foot tape measure and a torpedo level, the small level that fits in a pocket and tells you when a shelf is actually straight.
- An adjustable wrench and a pair of slip-joint or tongue-and-groove pliers for the plumbing fittings.
- A utility knife with fresh blades: dull blades slip and cause more trouble than sharp ones.
- A non-contact voltage tester and a small flashlight or headlamp.
- A putty knife, a tube of lightweight spackle, and a sanding sponge for wall work.
- A modest assortment of screws, wall anchors, and picture hangers so you are not driving to the store mid-job.
- A cordless drill/driver, genuinely useful, but the thing to buy after the hand tools, not before. When you do, choosing a cordless drill covers what actually matters and what is marketing.
Buy the tools you will use weekly at decent quality and let the rare ones be cheap or borrowed. A good screwdriver and a good tape measure are worth the money because you handle them constantly; a specialty tool you use once a year is not. If you want the full reasoning on where to spend and where to save, the companion guide to building a starter tool kit breaks it down piece by piece. And when the kit outgrows a drawer and you want a real place to work, the guide to setting up a home workshop covers organizing a bench and storage so the tools are ready when you are, and building a simple workbench is a good first project for the space itself.
Knowing the line: five jobs to hand to a pro and why
Confidence with the skills above is worth exactly as much as the judgment to know where they end. These are the jobs I hand off, and the reason for each, because "leave it to a pro" is only useful advice if you understand why.
- Anything gas. A line, a valve, a burner. The failure mode is not a mess, it is a fire or a leak you cannot smell in time. There is no learning curve worth being on here. Turn it off in an emergency; leave the work to a licensed tech.
- The main electrical panel and the service entrance. Replacing a switch on a dead circuit is DIY. Opening the main panel, adding a circuit, or touching the incoming service is not, because the main lugs stay live even with the main breaker off. The cost of a mistake is measured in a way no repair saving justifies.
- Anything structural. Removing a wall you are not certain is non-load-bearing, cutting joists or rafters, altering anything that holds the house up. Get a professional to confirm what is load-bearing before any cut. Guessing wrong here shows up slowly, as sagging floors and cracked walls, and it is expensive to undo.
- Sewer and main water lines. A clogged sink trap is yours. A main sewer backup, a leak in the buried supply line, or repiping is not. The access, the code, and the consequences of a mistake are all beyond the starter skills.
- Roof and anything at height that could fail. A roof leak's real repair usually means working where a slip is serious and where a wrong patch just moves the leak. This is as much about the working conditions as the skill.
The through-line: hand off the jobs where a mistake is dangerous, hidden, or wildly expensive to reverse, and keep the ones where a mistake just means redoing the work. That single filter will steer you right more often than any checklist.
A sane order to learn these in
You do not learn all of this in a weekend, and trying to is how people get discouraged. Here is the order I would actually recommend, each step building tool familiarity and confidence for the next.
Start with turning things off. Before you fix anything, spend one quiet afternoon finding and exercising every water stop, testing which breaker runs which room, and locating the gas shutoff. This is the highest-leverage hour you will spend, because it makes every later job safe and reversible. Nothing to buy, nothing to break.
Then do a wall patch, even a made-up one on a hidden wall, just to feel how thin coats and feathering work. It is forgiving, it teaches patience, and it removes the fear of "damaging" a wall that stops people from trying anything.
Next, a toilet or faucet fix, because it is where the money is and it drills the hand-tight-plus-a-quarter-turn rule into your hands. Do it once and the mystery of plumbing mostly evaporates.
Then doors and drawers, the quick satisfying wins that reuse the screwdriver skills you already have and teach you to diagnose before you cut.
Finally, fastening and mounting, once you have the feel for how tight is tight, so your shelves and rods actually hold.
Work in that sequence and each skill hands you something for the next. The overtightening rule you learn on a supply line saves your wall anchors. The shutoff habit makes the leak fix calm instead of frantic. Within a season of doing one small job at a time, the handyman's list of easy calls becomes your own routine, and the calls you do make will be the ones that genuinely deserve a professional. That is the goal: not to do everything yourself, but to know clearly which jobs are yours and to do those well.