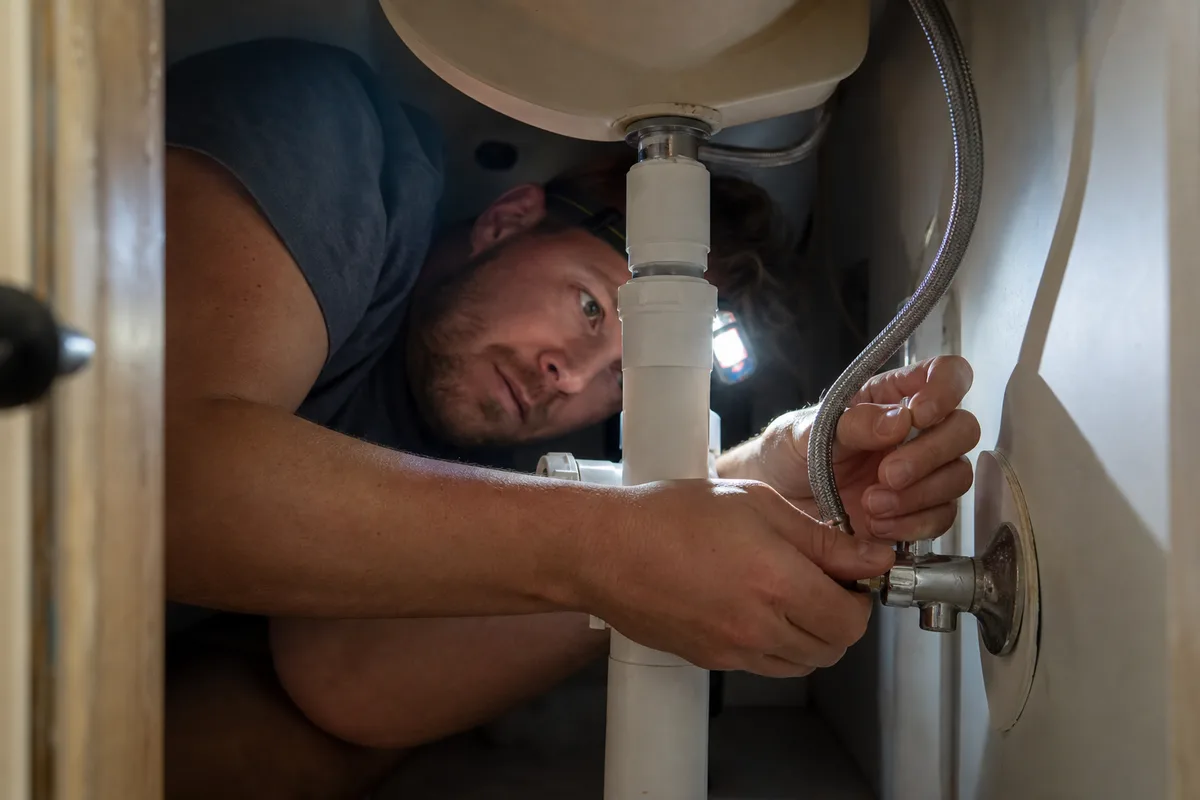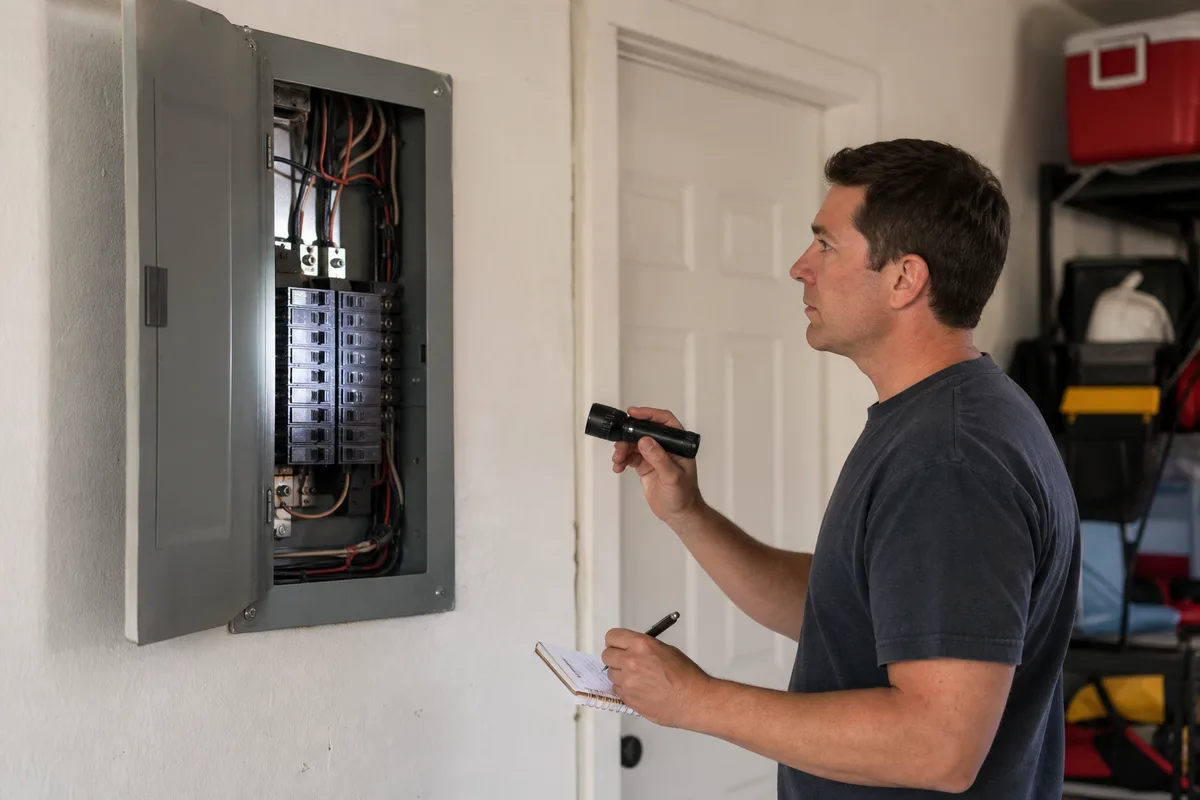
The first time a supply line let go under my kitchen sink, I lost about four minutes just finding where to turn the water off. Four minutes does not sound like much until you are on your knees with a cabinet full of cleaning bottles, water spreading across the floor, and no idea which of the two little valves under there actually does anything. I got it stopped, but I made a promise to myself that afternoon: I was never going to be surprised by my own house again. Not by where the water shuts off, not by which breaker kills the bedroom outlets, not by why one room never cools down in summer.
This article is the map I wish I'd had that day. It is not a repair guide. I am not going to teach you to sweat a copper joint or wire an outlet here. Instead I want to hand you the mental model: how water gets into your house and back out, how power travels from the panel to the thing you plugged in, and how air moves through the place to heat and cool it. Once you can picture the whole path, every specific repair stops feeling like guesswork. You stop reacting to a puddle or a dead outlet and start tracing it back to a point you can control. That shift, from panic to tracing, is the entire point.
Why a mental map beats memorizing fixes
There are hundreds of small home repairs, and you will never memorize them all. What you can do instead is understand three delivery systems, because almost everything that goes wrong is a delivery system misbehaving somewhere along its path. A leak is water leaving the pipe before it reaches the fixture. A dead lamp is electricity not completing its loop. A stuffy back bedroom is air that isn't moving. If you know the path, you know where to look, and looking in the right place is most of the job.
I'll give you a concrete example of how much this saves. A neighbor once called a plumber because a toilet in the guest bath kept running. The plumber charged a trip fee just to walk in, then replaced a flapper valve that costs about six dollars. That is a memorable ratio. The running toilet was a five-minute fix she could have done herself, and I'll point you to exactly how in a moment. But the reason she called was not the difficulty. It was that she had no framework for the noise. She didn't know a toilet holds a small tank of water that refills between flushes, so a constant trickle meant the tank was never sealing. Give someone that one picture and the mystery dissolves.
The mental map does one more thing that matters more than any single repair: it tells you when to stop. Every system in your house has a line where a beginner should hand it off. Knowing the map means you can walk right up to that line with confidence and not cross it by accident. You'll see me draw that line in each section below. Respecting it is not timidity. It is the difference between a homeowner who saves money for decades and one who turns a cheap problem into an expensive one on a single bad afternoon.
If you want the broader picture of which repair skills are worth learning first and in what order, the core home repair skills every homeowner should build sit alongside this map. Think of that as the "what to learn" and this as the "how it all connects."
The water system from meter to fixture
Water in a typical house travels a single main road with a lot of side streets. It enters from the municipal supply or a well through one large pipe, usually three-quarters of an inch or one inch in diameter. That pipe passes through a meter, either at the street in a buried box or just inside the house near where the line enters, often in a basement, crawlspace, or garage. The meter is the utility's cash register; everything downstream of it is water you are paying for, which is exactly why a hidden leak shows up on a bill before it shows up on a floor.
From the meter, the main line usually splits almost immediately. One branch heads to the water heater, and from there a parallel set of hot lines runs back out to fixtures. The other branch stays cold and feeds everything directly. So behind your walls you generally have pairs of pipes traveling together, a hot and a cold, tapering down from three-quarter-inch trunk lines to half-inch branches and finally to the little three-eighths-inch flexible supply lines that connect to a faucet or toilet. Water pressure in a home commonly sits between 40 and 60 pounds per square inch. Above about 80 psi, the constant strain starts finding the weakest fitting and forcing it to weep, which is why so many "random" leaks are really a pressure problem wearing a disguise. Plumbing rarely does anything at random; it just doesn't explain itself.
Waste water is the return trip, and it works on a completely different principle: gravity, not pressure. Drain pipes are wider, usually an inch and a half for sinks and three or four inches for toilets and the main sewer line, and they slope downhill at roughly a quarter inch per foot so the water carries the solids along. Paired with every drain is a vent, a pipe that runs up through the roof to let air in behind the draining water. That vent is why a sink sometimes gurgles or drains slowly for no reason you can see: the vent is partly blocked and the drain is fighting a vacuum. Knowing that supply is pressurized and drainage is gravity-fed tells you instantly which kind of problem you're facing. A supply leak sprays or drips continuously because the pipe is always under pressure. A drain leak only shows up when something is actually draining through it.
Finding and using the three water shutoffs
Here is the single most useful thing in this article. Most homes have three tiers of water shutoff, and knowing which one to reach for keeps a small fix from shutting off water to the whole house. The three tiers are the fixture stop, the branch valve, and the main.
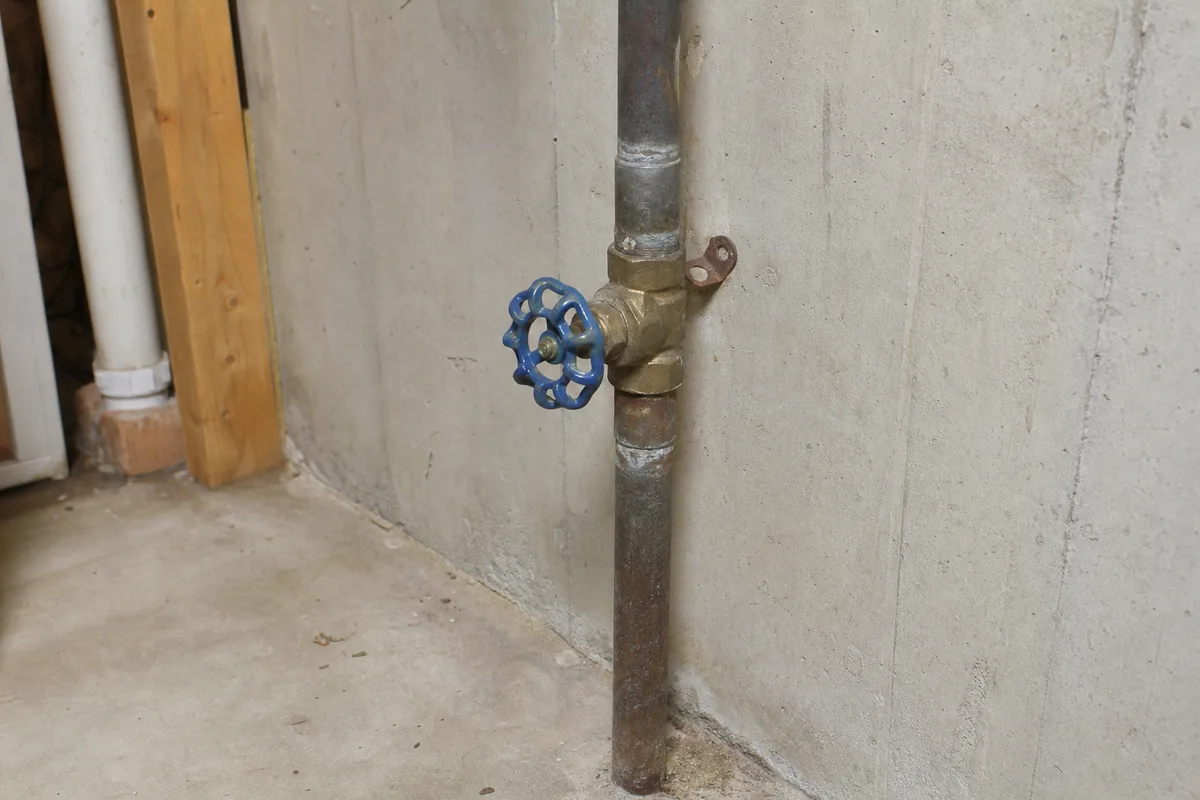 A main water shutoff valve on a pipe near a basement wall
The fixture stop is the small valve right at the point of use. Under a sink you'll find one or two of them where the supply lines meet the wall, usually an oval or football-shaped handle you turn clockwise. A toilet has one on the wall behind and slightly left of the bowl. These let you work on one faucet or one toilet without disturbing anyone else in the house. When my kitchen line failed, the fixture stop was all I ever needed; I just couldn't find it fast enough. Turn it clockwise until it stops, then open the faucet above to confirm the water dies. If the stop is old and hasn't been touched in years, turn it gently. A brittle valve that hasn't moved since installation can snap or start weeping at the stem, and now you've made a second problem while trying to fix the first, which is the classic homeowner two-for-one. If a fixture stop won't fully close, that's your signal to move up a tier.
The branch valve is the middle tier, and not every house has obvious ones. In homes with a manifold or with valves installed at zones, you might find a valve that isolates all the fixtures in one bathroom, or the whole cold line, or an outdoor spigot. If yours has them, they're usually near where the branch splits off the main, often clustered in the basement or a utility area. Label them the day you find them, because an unlabeled branch valve is nearly useless in an emergency.
The main shutoff kills water to the entire house, and everyone in the household should be able to find it in the dark. It sits on the main line, typically within a few feet of where that line enters the house, close to the meter. It's either a lever-style ball valve, which you turn a quarter turn until the handle is perpendicular to the pipe, or an older round wheel-style gate valve that you turn clockwise many full rotations. Go find yours right now and actually operate it once. Gate valves in particular seize up if they're never exercised, and the moment you truly need it is the worst possible time to discover the wheel won't budge. If your only shutoff is a stubborn gate valve, that's a reasonable thing to have replaced with a modern ball valve before it fails you. Reserve the main for real emergencies and for jobs where no smaller valve exists, because shutting the main means someone in the shower gets a cold surprise. This tiered approach is exactly the kind of orientation that makes a job like learning to stop a toilet from running feel routine instead of intimidating, since step one there is simply reaching for the right fixture stop.
The electrical system from panel to outlet
Electricity comes into a house through a service drop or underground lateral, passes through the utility's meter, and lands in your main service panel, the gray metal box most people call the breaker box. In a modern home that service is commonly rated at 200 amps, though older houses may be 100 amps and very old ones less. That rating is the total the whole house can draw at once, and it's why a big old house with a small panel struggles when a window air conditioner and a space heater and a microwave all run together.
Inside the panel, two hot legs feed a stack of circuit breakers. Each breaker is the start of one circuit, a loop of wire that leaves the panel, travels to a set of outlets or lights or a single appliance, and returns. The breaker's job is protection: it's a switch that trips itself off if the current on that circuit climbs past its rating, usually 15 or 20 amps for the general outlet and lighting circuits in living spaces. A 15-amp circuit uses 14-gauge wire; a 20-amp circuit uses thicker 12-gauge wire. That pairing is not a suggestion. Putting a 20-amp breaker on 14-gauge wire lets the wire carry more current than it's rated for without the breaker ever tripping, and that is precisely the kind of thing that overheats inside a wall. It's one reason I tell people not to swap a tripping breaker for a bigger one to "fix" the tripping. The breaker isn't the problem; it's the messenger.
A circuit that keeps tripping is telling you one of two things: either too much is plugged into it, or something on it has a fault. The picture to hold in your head is the loop. Power leaves on the hot wire, does work at the outlet, and returns on the neutral. A ground wire rides along as an escape path if something goes wrong. When a hair dryer and a heater on the same bathroom circuit trip the breaker, that's an overload, the loop simply carrying more than 15 amps. When a breaker trips the instant you flip it back on with nothing plugged in, that's a fault, and that's where a beginner should stop and call an electrician. Understanding the panel and safely mapping it is well within reach; diagnosing a dead short inside a wall is not. If you want to go deeper on the loop itself, how a home circuit actually carries power from panel to plug walks through it in detail. My hard rule: I'll turn breakers on and off and label them all day, but I do not open the panel cover or touch a wire. The main lugs inside stay energized even with every breaker off, and that space belongs to a pro.
Reading and labeling your breaker panel
Open the panel door, not the cover, just the door, and you'll see a column or two of breakers, each with a small number stamped on its switch: 15, 20, sometimes 30 or 50 for larger appliances. Next to them should be a directory, a little chart where someone was supposed to write what each breaker controls. In most houses I've looked at, that chart is either blank, wrong, or written in a shorthand only the original owner understood, and he is not answering his phone. A useful afternoon is spent fixing that.
Labeling the panel properly is a two-person job, and it goes faster than you'd think. Grab a helper, a phone to talk on or just a loud voice, a flashlight, and a lamp or a simple plug-in tester. One person stands at the panel and flips a single breaker off. The other walks the house calling out what died: "bedroom outlets gone, hall light still on." You write it on the directory, flip the breaker back, and move to the next one. Work methodically down the column so you don't skip one. For circuits that feed only outlets, plug a lamp into each outlet in a room and watch for it to go dark so you catch the ones you'd otherwise miss. The whole job runs about 30 minutes for an average house, and that half hour pays you back every single time the power blips or you need to kill a circuit before hanging a light. Instead of standing in a dark utility room flipping breakers at random and hoping, you read the chart, flip one, and you're done.
Write labels by room and function, not by guess: "Kitchen counter outlets," "Living room + front porch light," "Furnace." Note anything unusual too, like a bedroom outlet that turns out to share a circuit with the garage, because those surprises are exactly what trip people up later. If you find a breaker that controls nothing you can identify, don't ignore it; label it "unknown, do not remove" and mention it to an electrician next time one is out, since a mystery circuit occasionally means a junction box hidden behind drywall. Label the main breaker too, usually the big double one at the top, so anyone can cut all power in one motion if they ever have to.
How air moves: HVAC in plain terms
Heating and cooling confuse people because the air seems to come from nowhere, but it runs in a loop just like water and electricity. The system pulls room air in, conditions it, and pushes it back out, over and over. Picture two sets of vents. The return vents, usually larger and often just one or two big grilles in a hallway or central wall, suck air out of the house. That air travels back to the furnace or air handler, passes across a heating element or a cold coil, and gets blown back out through the smaller supply registers in each room, the ones with the little levers to aim the flow. Hold a hand near a return and you feel it pulling; near a supply and you feel it pushing. That simple test tells you which is which and confirms the blower is actually running.
The piece of this loop that fails most often, and the cheapest one, is the filter. It sits where the return air enters the system, either in a slot at the furnace or air handler or behind that big return grille on the wall. Its job is to catch dust before the air crosses the equipment. When it clogs, it chokes the whole loop. A clogged return-air filter is behind a surprising share of "my AC is weak" calls, and it's a part that often costs around five dollars that most people never check. It is the cheapest thing in the whole loop and, reliably, the last thing anyone thinks to look at. Airflow drops, rooms far from the unit stop getting their share, and in cooling weather the coil can even ice over from the reduced flow, which makes the "weak" feeling worse. Before anyone pays for a service call about weak airflow, the filter is the first thing to look at.
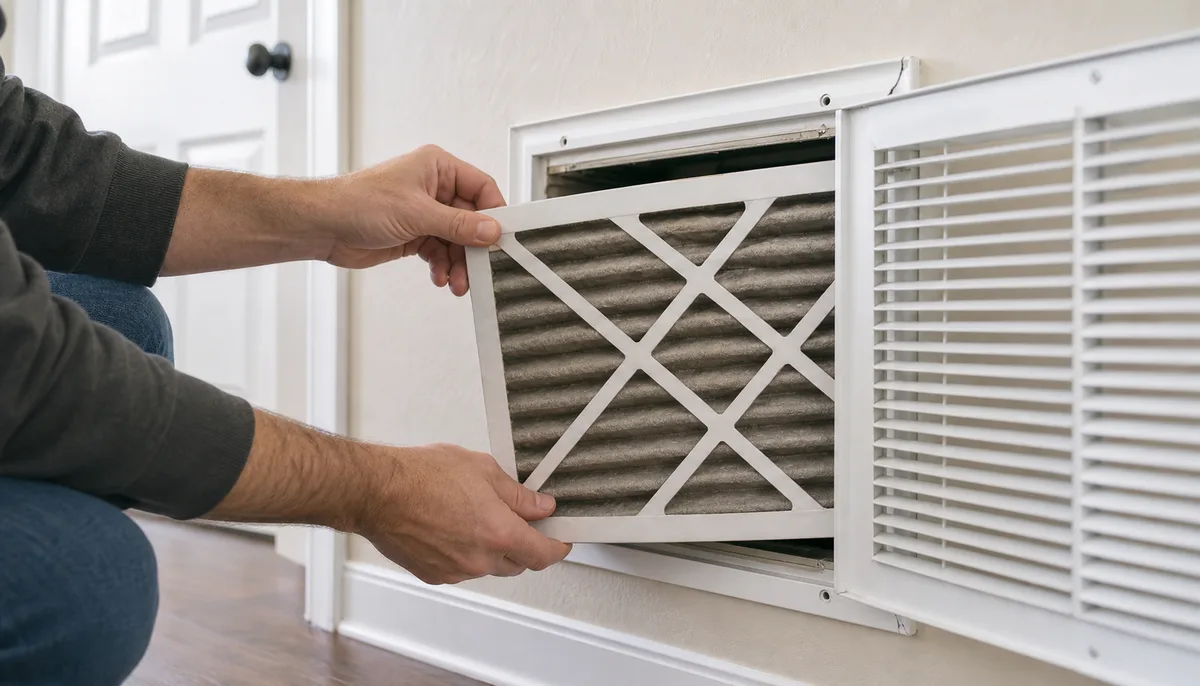 Removing a dirty return-air filter from a home HVAC vent
Pull the filter and hold it up to a light. If you can't see light through it, it's done. A new one slides in with an arrow printed on the frame that must point in the direction of airflow, toward the furnace and away from the room. Getting that arrow backwards is a common miss; the filter still fits, which is exactly how it lulls you, it just works poorly. Most homes do fine changing it every one to three months, more often if the house is dusty or the fan runs constantly. Beyond the filter, the parts of HVAC that a homeowner can safely touch thin out quickly. You can keep the outdoor condenser unit clear of leaves and grass clippings and hose its exterior fins gently, and you can keep supply and return vents unblocked by furniture. But refrigerant, gas connections, and the wiring inside the air handler are pro territory, full stop. If the system won't run at all, or you smell gas, that's not a DIY moment, and I'd add that gas smell means leaving and calling from outside.
The maintenance checkpoints that prevent repairs
Once you can see the three loops, a short list of checkpoints keeps them healthy, and every one of them is cheaper than the repair it prevents. I run through these on a loose seasonal rhythm rather than a strict calendar, but the habit matters more than the exact dates.
For water, walk the house every few months and look under every sink with a flashlight, feeling the supply lines and the P-trap for any dampness. A supply line that's just starting to weep leaves a faint mineral crust or a dark spot long before it bursts, and catching it there is a two-dollar fix instead of a flooded cabinet. Check the water heater area for rust or moisture on the floor. Exercise the main shutoff a quarter turn and back once a year so it never seizes. If your house has a pressure regulator and you own a simple gauge, confirming pressure sits under 80 psi once in a while catches the slow strain that causes those mystery leaks.
For electricity, the checkpoints are mostly about paying attention. A breaker that trips repeatedly, an outlet or switch plate that feels warm, a faint buzzing, or a burning smell near a receptacle are all signals to stop using that circuit and get it looked at. Test your GFCI outlets, the ones with the test and reset buttons in kitchens, bathrooms, garages, and outdoors, by pressing test monthly; the power should cut, and reset should restore it. If it doesn't respond, the outlet has worn out and needs replacing. These are protective devices, and a dead one gives you no warning that it's failed.
For air, the filter is the headline act, checked monthly and changed when light won't pass through it. Twice a year, once heading into cooling season and once into heating, walk outside and clear the condenser unit, and walk inside to make sure no rug or couch has crept over a return grille. A blocked return starves the whole system as surely as a dirty filter. Keeping this short maintenance loop is the least glamorous part of owning a house and the part that quietly saves the most, because nearly every emergency I've described started as a checkpoint someone skipped for a year too long.
What to note down before you ever need it
The final step is to get all of this out of your head and onto something you can find in a hurry, because an emergency is precisely when memory fails. I keep a single sheet of paper, and I mean actual paper, taped inside a kitchen cabinet door, plus a photo of it on my phone. When water is spreading across a floor, nobody wants to be searching a folder.
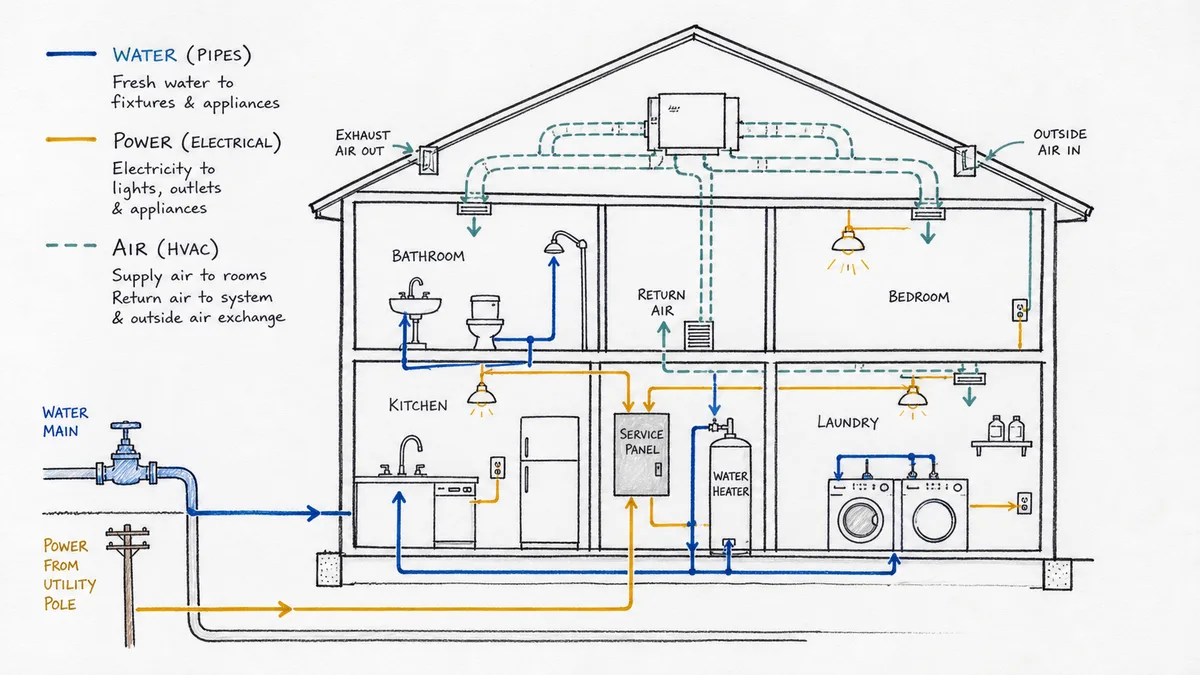 A hand-drawn diagram of a home's water, electrical, and air systems
On that sheet, sketch the three loops. For water, draw where the main enters, where the main shutoff is, and note any branch valves and what each one isolates. Mark where the water heater sits. For power, note where the panel is and, crucially, reference your finished breaker directory; you can even photograph the labeled directory and keep it with the sheet. For air, note where the filter lives, what size it is, and which direction the arrow points, because standing in a store trying to remember whether it was 16 by 25 or 20 by 25 is a small misery you can skip. Add the location of the gas shutoff if you have gas service, and the outdoor condenser.
Then walk the whole family or anyone who lives there through it once, especially the main water shutoff and the main breaker, so you are not the only person who knows. The goal is that anyone in the house, on the worst day, can find and operate the one control that stops the problem from getting bigger. That is the real payoff of understanding your home's systems. You're not trying to become a plumber, an electrician, and an HVAC tech. You're trying to know the map well enough that when something goes wrong, you already know where to put your hand. Everything else, every specific repair you'll ever learn, gets easier once that map is in place. Start with the shutoffs and the panel this weekend, and the next surprise won't cost you four frantic minutes on your knees.