A bathroom faucet that drips at the spout or wobbles when you grab the handle feels like a plumber's problem, and that is exactly why so many people pay for one. The truth is that a full faucet swap is one of the friendliest jobs in the house. You are not cutting into a wall, you are not touching a soldered joint, and everything you connect threads on by hand. The whole thing lives in the cabinet under the sink, at eye level once you are lying on your back, and it comes apart and goes back together with two or three tools most people already own.
I have swapped enough of these to know where the job is genuinely easy and where it tries to trip you. The easy part is the faucet itself. The two places it turns into a hardware-store trip are a shutoff valve that has seized under the sink and a set of mounting nuts fused with corrosion up in the cramped space behind the basin, both of which seem to wait patiently for the exact moment you have committed. Neither is common, but both are worth knowing about before you start, because the fix for each is cheap if you plan for it and annoying if it surprises you mid-job. This walkthrough takes the whole thing in order, calls out those two moments plainly, and finishes with the leak test that decides whether you did it right.
Deciding it's a swap, not a repair
Before you buy anything, it is worth being honest about whether the faucet needs replacing at all. A lot of "leaky faucets" are a worn part inside a faucet that is otherwise fine, and swapping a five-dollar cartridge is faster and cheaper than a full replacement. So spend a minute diagnosing before you commit.
A drip from the spout (water forming and falling from the actual outlet after you have shut the handle off) is almost always an internal part: a cartridge, a set of rubber seals, or on older two-handle faucets, a washer and seat. That is a repair, not a swap. If the faucet body is solid, the finish is fine, and you like it, fixing the internals is the right call and you can stop reading a replacement guide.
A drip or seep from the base of the faucet, where it meets the sink, or a spreading wobble in the handle or the whole fixture, points a different direction. Base leaks mean the seal under the faucet has failed or the mounting nuts have loosened, and while you can sometimes re-seat and re-tighten, on an older faucet the metal is often pitted underneath where you cannot see it. A wobble usually means the mounting hardware has corroded or the plastic under-sink nuts have cracked. Once you are that far in, and especially if the finish is worn or the handle feels gritty, a replacement is the cleaner path. New faucets are inexpensive, and you are not going to enjoy chasing seals on a fixture that is tired all over.
There is one more honest reason to swap rather than repair: parts availability. On a faucet more than fifteen or twenty years old, or an off-brand one, the exact cartridge can be genuinely hard to find. If you have already spent an evening holding a mystery cartridge up to your phone, comparing it against forty near-identical photos with no model number, replacing the whole faucet sidesteps the guessing. This kind of judgment (restore the thing or replace the system) comes up in every corner of home repair, and the broader map of which small repairs are worth learning first puts faucet work in context with the other jobs a homeowner meets most.
A quick pre-purchase check that saves a wasted trip
Two things to confirm before you drive to buy a faucet. First, count the holes in your sink or countertop. Most bathroom sinks are drilled either for a single-hole faucet or for a three-hole spread, and the common three-hole spacing is 4 inches center to center for a "centerset" and 8 inches or more for a "widespread." Buying a single-hole faucet for a three-hole sink leaves you with two open holes, and buying a widespread for a centerset sink will not line up. Measure center-to-center between the outer holes before you shop.
Second, and this is the one people skip, go under the sink and actually turn the shutoff valves off and back on before you buy anything. That test tells you whether the easy version of this job is available to you, and I will explain in the next section why it matters so much.
Tools, parts, and about an hour
You do not need much, and nothing here is specialized. A realistic first-time swap takes about an hour with the valves cooperating; a second one runs closer to thirty or forty minutes once you know the moves. Budget the full hour the first time so you are not rushing the leak test at the end.
The tools:
- An adjustable wrench, or better, a pair of them so you can hold one nut while turning another.
- A basin wrench, the one genuinely faucet-specific tool. It is a long-handled tool with a spring-loaded jaw that swivels, made to reach the mounting nuts up behind the basin where no normal wrench fits. You can sometimes get by without it on an open-bottom sink, but in a tight vanity it turns an impossible reach into a two-minute job, and it costs about the same as a plumber's first ten minutes.
- Slip-joint or tongue-and-groove pliers for the supply-line nuts and general grip.
- A bucket or a shallow pan and a couple of old towels for the water that will drain out of the lines.
- A flashlight or headlamp. A headlamp is worth it here specifically because both your hands are busy and the cabinet is dark. Working blind under a sink is how you cross-thread a fitting.
- A utility knife or a putty knife for scraping old sealant off the sink deck.
The parts:
- The new faucet, matched to your hole count and spacing. Most come with their own base gasket or a ring of putty in the box, plus the mounting hardware.
- A pair of new flexible braided supply lines, sized to reach from your shutoff valves to the faucet inlets. This is the part people leave out, and it is a mistake I will come back to: buy them.
- Plumber's putty or silicone, only if your faucet does not include its own gasket. Read the box; many modern faucets seal with a rubber or foam gasket and specifically tell you not to use putty.
- Thread seal tape (the thin white tape, often called PTFE tape) for the threaded connections, a cheap roll that lasts for years.
If you want to understand why the water arrives at the faucet the way it does (why there are two supply lines, why the shutoffs sit where they do), the overview of how a house's water and other systems fit together makes the under-sink layout make sense rather than looking like a random tangle.
Shutting off water and clearing the lines
This is the step that makes the whole job safe and dry, and it is also where the first of the two trouble spots lives.
Under the sink you will find two small valves, one on the hot line and one on the cold, each feeding a supply line up to the faucet. These are your fixture shutoffs. Turn each one clockwise until it stops. That closes the water to this faucet only, so the rest of the house keeps running while you work.
Here is the warning worth taking seriously: old shutoff valves can seize. A valve that has sat untouched for ten or fifteen years sometimes will not turn, or turns but does not actually stop the water, or, the worst case, the little handle spins merrily in your fingers because the stem has broken loose inside, offering no resistance and no help. This is why I told you to test the valves before buying the faucet. If you discover a stuck valve after the old faucet is already off, you are stuck with an open water line and no easy way to close it, which turns a calm thirty-minute job into a scramble for the main shutoff and possibly a call you did not want to make. Test first. If the valve turns smoothly and the water stops, you are clear to proceed. If it does not, jump ahead to the last section before you go any further, because that changes the plan.
Assuming the valves close properly: after shutting both, open the faucet handles and let the pressure bleed off. Water will run for a second and then trickle to nothing. Leave the handles open. This does two things: it confirms the shutoffs actually worked, and it lets the lines drain instead of dumping their contents on your arm when you disconnect them.
Now put your bucket or pan under the connections and disconnect the supply lines at the shutoff valves with your wrench or pliers. A cup or so of water will drain out of each line; that is normal, and it is why the pan is there. Hold the valve body steady with a second wrench as you loosen the nut so you do not twist the valve and stress the pipe behind it. With both lines free at the bottom, the water side is fully clear and you can move to the faucet itself.
Removing the old faucet cleanly
The old faucet is held from underneath by mounting nuts, and this is the second place the job can get stubborn. Everything is up in the dark, behind the basin, in a space your hand barely fits.
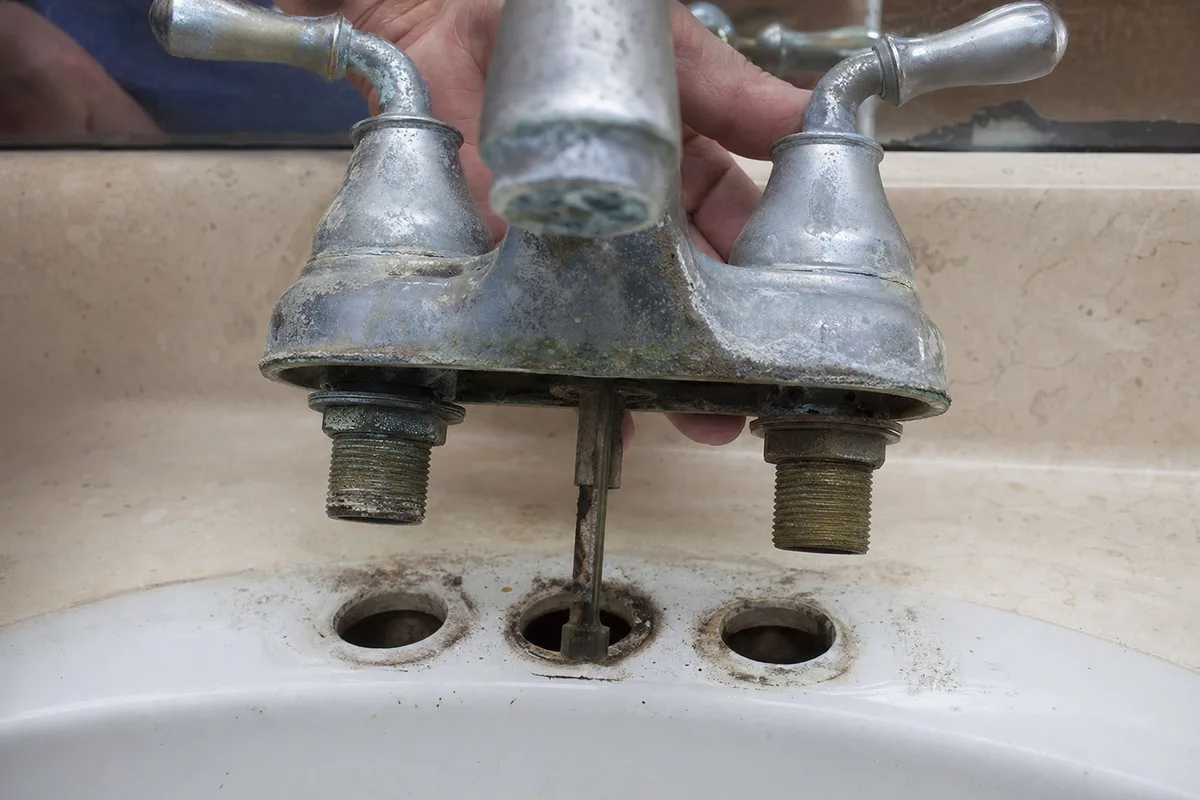 Removing an old corroded faucet from a bathroom sink
Start by disconnecting the supply lines at the top, where they thread into the faucet's inlet shanks, if they are still attached. On many older faucets the supply lines are permanently attached copper tubes rather than removable braided lines; if so, you will remove them together with the faucet, which is fine because you are replacing them anyway.
Next, find the mounting nuts. Reach up behind the basin and feel for a large plastic or brass nut threaded onto each faucet shank, holding the faucet down against the sink. This is where the basin wrench earns its place. Hook its jaw onto the nut, and because the handle extends down where your hand can actually reach, you can turn it without contorting. Turn to loosen. Remember that reaching up and behind reverses your sense of direction, so if it will not budge, make sure you are actually turning it the loosening way before you assume it is stuck. Plenty of "seized" nuts are just being tightened very confidently.
If a nut is genuinely corroded on, a few things help before you resort to force. A shot of penetrating oil and ten minutes of patience frees most of them. Turning the water fully off and letting the joint dry can help too. As a last resort, a corroded nut can be cut, but that is rarely needed on a bathroom faucet's plastic hardware. Most of the time these nuts spin off once the wrench gets a real grip.
With the nuts off, the faucet lifts straight up and out of the sink holes. Expect resistance from old sealant: decades of plumber's putty or silicone glue the base down. Work a putty knife or the edge of a utility blade under the base to break the seal, then lift. Set the old faucet aside.
Now, before the new one goes in, clean the sink deck completely. Scrape off every trace of old putty and silicone with the putty knife, then wipe the area down until it is smooth and dry. A new gasket or fresh putty will not seal against a ridge of old crumbly sealant, and a base leak that shows up a week later almost always traces back to a deck that was not cleaned. Take the extra two minutes here.
Setting the new faucet and sealing the base
With a clean, dry deck, the new faucet goes in reversed from how the old one came out. The one decision to get right is how you seal the base, and the answer is written on your faucet's box. Do not guess.
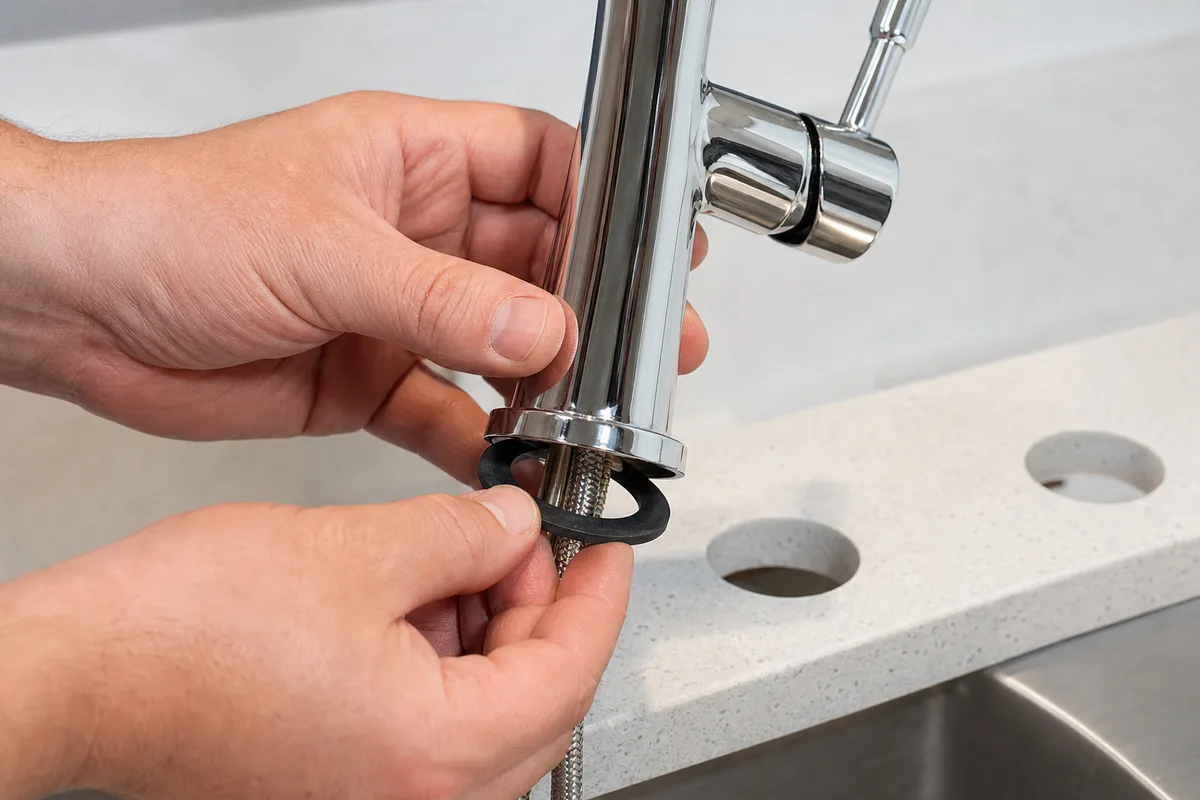 Fitting a gasket to the base of a new bathroom faucet
Most modern bathroom faucets come with a rubber or foam gasket that sits between the faucet base and the sink. If yours has one, use it, and do not add putty on top; the gasket is the seal, and putty underneath a gasket can actually hold it off the surface and cause a leak. Set the gasket onto the faucet's underside so it lines up with the shanks.
If your faucet has no gasket and the instructions call for plumber's putty, roll a rope of putty about the thickness of a pencil, press it in a ring around the base of the faucet where it will contact the deck, and set the faucet down onto it. The putty squeezes out into a thin seal as you tighten. Wipe away the excess that squeezes out around the edge. Putty is the traditional method and it works, but read the box first, because some finishes (certain stones and some coated surfaces) can be stained by putty, in which case silicone is specified instead.
Feed the faucet's shanks (and any pre-attached supply tubes) down through the holes in the sink and set the base down onto the deck, oriented straight. Then go underneath and thread the mounting nuts back on, snugging them up with the basin wrench. Here the same restraint that governs all plumbing applies: snug them firmly so the faucet sits tight and does not rock, but do not crank on them. These nuts are often plastic, and overtightening cracks them or distorts the base. Tight enough that the faucet does not wobble when you wiggle the spout is tight enough. Check from above that the faucet sits square and centered before you move on.
Connecting supply lines the right way
This is the connection that most often weeps if done carelessly, and it is also where I insist you install new parts rather than reusing the old.
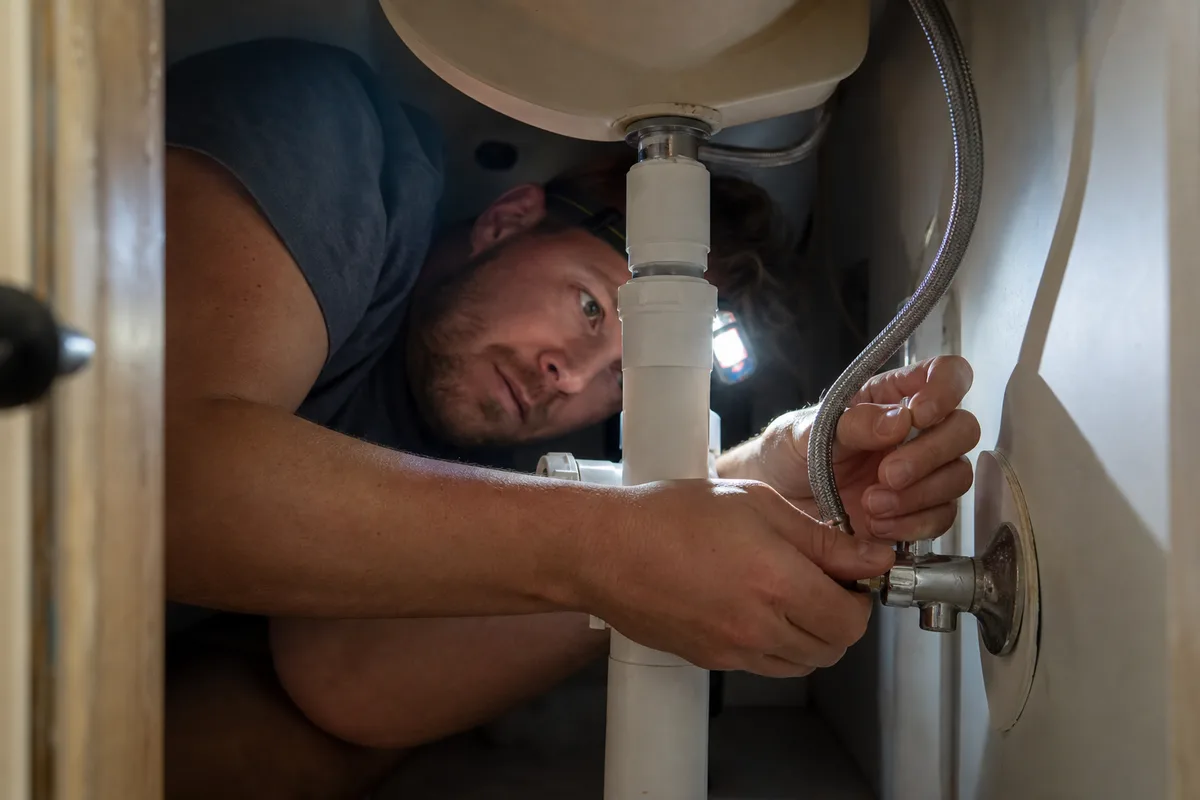 Connecting a flexible supply line under a bathroom sink
Replace the flexible supply lines while you are under there. Braided stainless supply lines cost only a few dollars each, and they are the part in this whole assembly most likely to fail next: the rubber inside them ages, and a line that is fine today can start weeping in a couple of years. You already have the cabinet open and the water off; putting in fresh lines now is a few dollars and two minutes of insurance against a future leak you would have to open everything back up to fix. Reusing a ten-year-old line to save three dollars is a false economy. Buy new ones, sized long enough to run from valve to faucet with a gentle curve, not stretched tight.
The connections themselves are threaded and they follow the rule that keeps every plumbing joint honest: hand-tight plus about a quarter turn. Thread the supply-line nut onto the faucet inlet by hand first, all the way, feeling that it starts smoothly and is not cross-threaded. A nut that binds after one turn is cross-threaded. Back it off and start again, because forcing a cross-threaded fitting ruins it. Once it is hand-tight, take a wrench and give it no more than a quarter turn further. Do the same at the shutoff valve end.
The temptation is always to reef on it, because it feels like tighter must mean more leakproof. This is one of the more expensive instincts in home repair, and it is the opposite of true. Overtightening a braided line crushes its rubber washer or cracks the fitting, and now you have made a leak instead of preventing one. If a joint weeps at hand-tight-plus-a-quarter, the fix is a fresh washer or a wrap of thread tape on the threads, never more force. The same restraint shows up in the toilet, which is why the walkthrough on fixing a running toilet hammers the identical point: snug, not cranked, is the whole discipline of home plumbing.
One note on which line goes where: connect hot to the hot inlet and cold to the cold. On a single-handle faucet especially, reversing them means the handle works backward for the rest of its life. The hot supply is conventionally on the left as you face the faucet. Route the lines so they curve gently without kinking, and make sure a line is not pinched against anything sharp in the cabinet.
The two-minute leak test that matters
Everything up to now is reversible. This step is what tells you whether the job is actually finished or just looks finished, and skipping it is how people end up with a stained cabinet floor a month later.
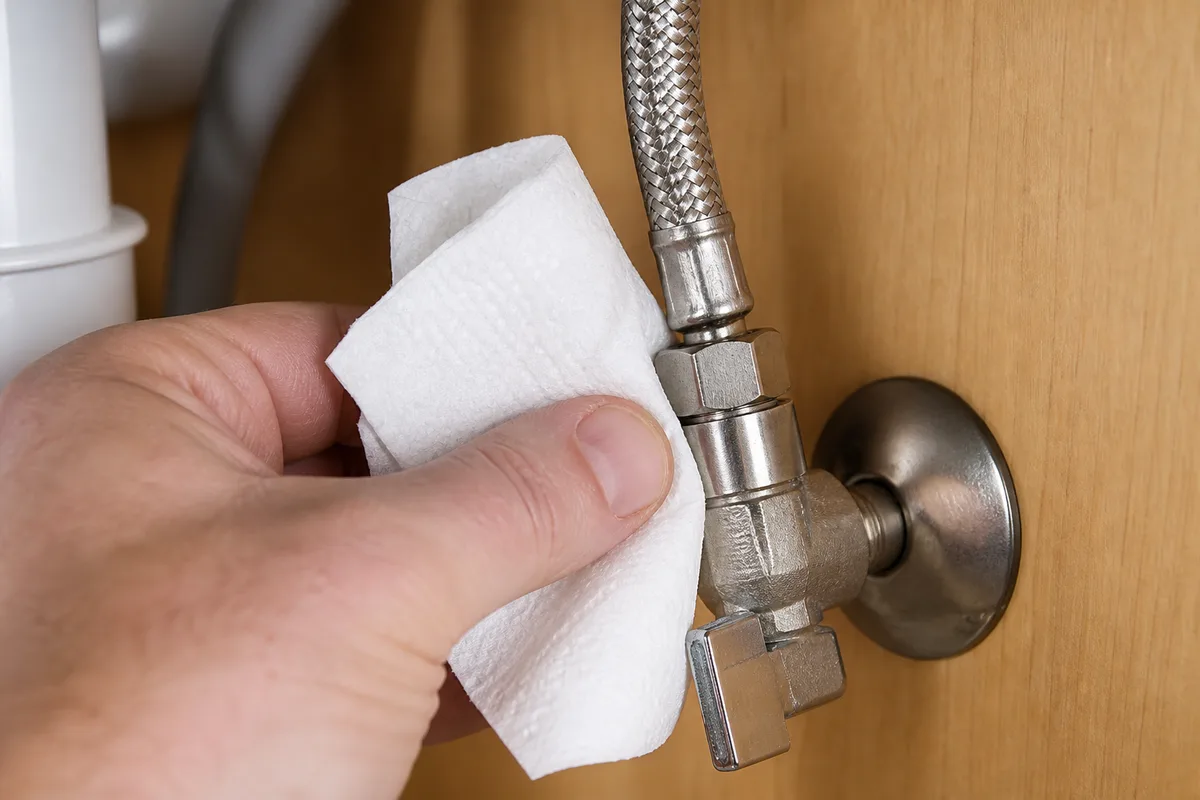 Checking a faucet supply line joint for leaks with a paper towel
First, with the faucet handles still open, slowly turn the shutoff valves back on, a quarter turn at a time, not all at once. Opening slowly lets the lines fill without a pressure hammer and gives you a chance to catch a bad connection before it sprays. As the lines fill, the open faucet will sputter and then run steady once the air is pushed out. Let it run for a moment, then shut the faucet off.
Now do the test that matters. Run the new faucet for two full minutes, hot and cold both, working the handle through its range so the internal seals see pressure in every position. Then take a dry paper towel and press it against every joint: both ends of each supply line, the base of the faucet where it meets the sink, and the underside where the shanks come through. A paper towel shows the faintest moisture that your eye and even your fingertip will miss on cool metal. Feel each joint dry. This matters because a slow weep is nearly invisible at first; it does not drip, it just wicks along the line and collects, and by the time you see it, it has been quietly staining the cabinet floor for weeks. Two minutes of running water and a paper towel now saves you that discovery later.
If a joint shows any damp, shut the water, and address that specific joint: usually a quarter turn more, or if it is already snug, a fresh washer or thread tape. Do not tighten everything in a panic; find the one joint that is wet and fix that one. Then run and test again. Also check the base seal from above by running water into the bowl and around the faucet, then feeling underneath for any that made it through. A base that was not cleaned or sealed well will show here.
Only when every joint reads bone dry after a full two minutes of running is the job done. Leave the cabinet doors open overnight if you want the extra reassurance, and glance at the floor of the cabinet in the morning. A dry cabinet the next day is the real signature that the swap held, and it is a quietly satisfying thing to check.
When a seized valve means calling a pro
Most of the time this job goes exactly as described. But there is a version where the honest answer is to stop and get help, and knowing where that line is keeps a small job from becoming a flooded bathroom.
The clearest stop sign is the seized shutoff valve I flagged at the start. If your under-sink valve will not turn, turns without stopping the water, or its handle spins loosely because the internals have failed, you cannot safely take the old faucet off, because you have no way to hold the water back at the fixture. In that case one option is to shut off the water at the house main, do the faucet swap, and while the water is off, also replace the failed shutoff valve, but replacing a shutoff valve is a real step up in difficulty. Many under-sink valves are compression fittings you can swap with the main off, but some are soldered onto copper pipe, and soldering a joint is a different skill with real consequences if it leaks inside the cabinet. If the valve is soldered, or if you are not confident closing and reopening the whole-house main, this is a reasonable place to bring in a plumber for the valve and then either let them finish or take the faucet from there yourself.
The other honest stop points are smaller but real. If a mounting nut is so corroded it will not come off even with penetrating oil and patience, and cutting it risks the sink, a pro has the tools and the practice to remove it without damage. If you uncover corroded or damaged pipe behind the valve (green crust, pinhole weeping on the pipe itself, not the joint), that is beyond a faucet swap and into pipe repair, which is a different job. And if after a careful install a joint keeps weeping no matter what you do, there may be a defect in the valve or a fitting that a second set of experienced hands will spot faster than another hour of your own troubleshooting.
None of these are failures on your part; they are just the boundary of what a faucet swap covers. The filter is the same one that serves across all home repair: keep the jobs where a mistake means redoing the work, and hand off the ones where a mistake means water inside a wall or a soldering torch in a cramped cabinet. For the ordinary faucet, though (good valves, accessible nuts, sound pipe), this is squarely a job you can own, and doing it once takes most of the mystery out of the cabinet under your sink for good.