A door that squeals every time someone walks down the hall, or one you have to shoulder to get shut, feels like the same annoyance. It is not. Most people reach for the same reflex either way, which is a plane or a can of spray oil, and about half the time they pick the wrong one. I have watched a homeowner shave a quarter inch off the latch edge of a door that only needed two screws driven a little deeper, and now that door swings shut with a gap you could slide a pencil through. The plane was very satisfying for about ninety seconds. That is the mistake this guide is built to keep you from making.
There are really three separate problems hiding under "the door won't behave," and each one has its own cause and its own fix. Sort out which one you have before you touch a tool, and the actual repair is usually ten minutes with things you already own. Skip the diagnosis and you can turn a five-minute job into a new door.
Three different problems that feel the same
When someone tells me their door is "acting up," I ask them to do one thing before I say anything: open and close it slowly, twice, and watch what actually happens. It feels like a strange request, standing there operating your own door under supervision, but nine times out of ten the door tells you which of three problems you have.
The first is the squeak. The door moves freely, latches fine, but it sings on the hinge somewhere in its swing. This is almost never a wood problem. It is metal on metal, or dried-out metal against a dry pin, and it lives entirely in the hinges. Nothing about the door slab itself is wrong.
The second is the rub, which is what most people mean by "sticking." The door drags against the frame or the floor somewhere in its travel. You feel resistance, you might hear a scrape, and there is often a worn spot to prove it. The rub is a fit problem: the slab and the opening are no longer the right distance apart at some point along the edge.
The third is the latch miss. The door swings freely and closes, but it will not stay shut, or you have to lift or push it to get the latch to catch. Here the door and the frame are fine as surfaces; the problem is that the latch bolt and the strike plate no longer line up. You could sand that door all week and never fix it, because nothing is rubbing.
The reason getting this right matters so much is that the fixes point in opposite directions. The squeak wants lubrication. The rub sometimes wants material removed, but often wants material added back by tightening. The latch miss usually wants the strike plate moved, not the door touched at all. Plane a door for a problem that was actually a loose screw, and you have permanently removed wood that you cannot put back. Wood does not grow. That asymmetry, that you can always take more off but never add it on, is the single most important idea in this whole subject, and it is why I preach diagnosis before cutting the way some people preach measuring twice.
If you are working through a whole house of small annoyances like this, it fits into the broader picture of the home repair skills worth learning first, where doors sit near the top of the list precisely because they are frequent, cheap, and easy to overreact to.
Reading where and when it sticks
Two questions answer most of the diagnosis: where along the door does the trouble happen, and when in the year did it start or get worse. Those two facts, together, point at the cause more reliably than anything else you can do.
Start with where. Close the door until it just touches, then look at the gap all the way around, called the reveal by people who hang doors for a living. A healthy reveal is even, roughly the thickness of a nickel, about a sixteenth of an inch, down both sides and across the top. Run your eye down it. If the gap is tight at the top on the latch side and wide at the bottom, the door has dropped on its hinges and is tipping into the frame at that upper corner. If it is tight all the way down one edge evenly, the whole door has shifted or swollen toward that side. If it scrapes the floor across the bottom, you are looking at the threshold or a sagging slab, not the frame.
The single most useful tell is the rub mark itself. A door that drags polishes the exact spot where it makes contact. The paint goes shiny, then the wood underneath shows a worn, burnished streak. That mark is a confession, and it does not lie the way the homeowner's memory of "it just started doing it" tends to. It tells you precisely which half inch of edge is doing the rubbing, so you fix that half inch instead of guessing and attacking the whole edge. I trace right along a fresh rub mark with a pencil before I do anything, because the shiny spot can be hard to see once you have the door off and the light is different.
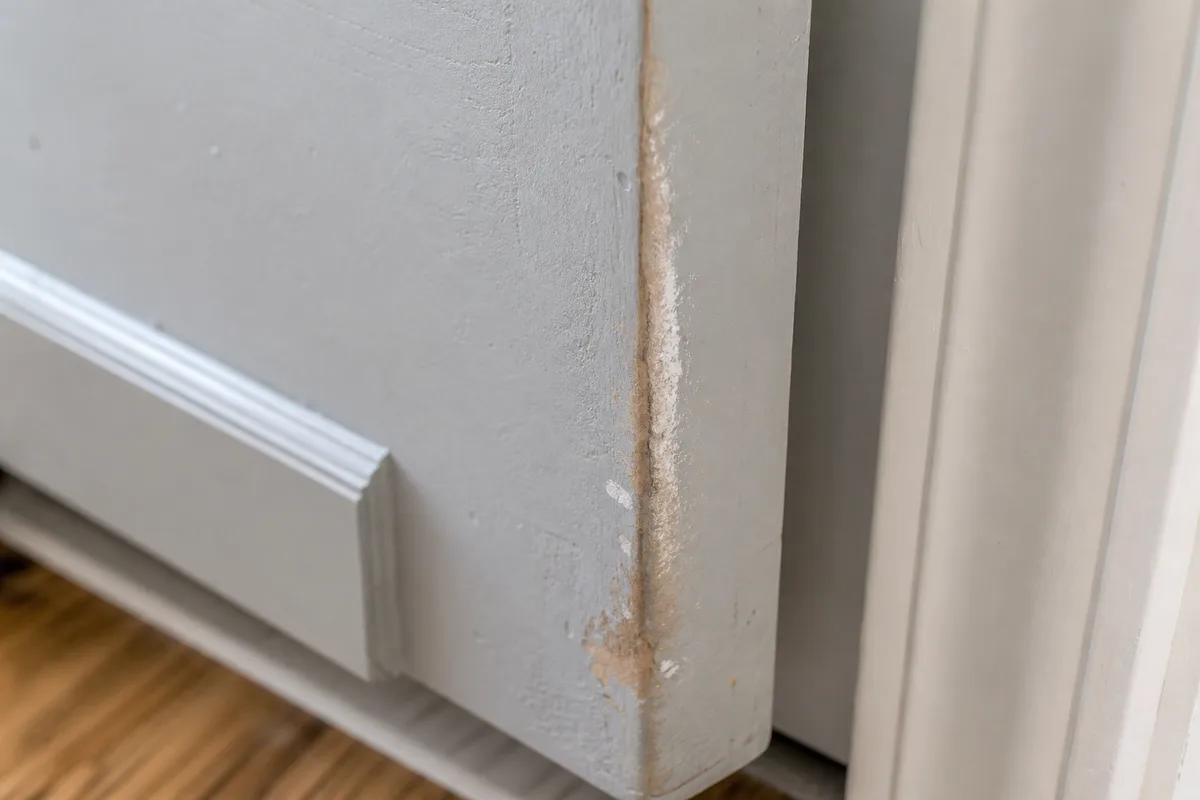 A worn rub mark on the edge of a sticking door
Now the when, because timing separates two causes that look identical on the day you are annoyed. If the door started sticking in July and swings clean again by October, that is moisture. Wood absorbs humidity and grows, mostly across its width, and an interior door in a humid month can gain enough to close the reveal on the swing side and start dragging. Come the dry heating season it shrinks back and the drag disappears. That is seasonal swelling, and I will come back to why it changes the whole plan.
If instead the sticking showed up and simply stayed, month after month, and never eases, that is not moisture. That is the door settling on worn hinges, or the frame moving as the house settles, or screws that have loosened over years of slamming. It will not clear on its own. The trap is treating a July swelling problem as if it were permanent, planing wood off in the worst month, and then living with a gappy, rattling door every winter afterward. The calendar tells you which one you have, so note it honestly before you decide.
The squeak: hinges and lubrication
The squeak is the easiest of the three and the one people overcomplicate. A hinge squeaks because the knuckle, the barrel where the two leaves interlock around the pin, has lost its lubrication and metal is grinding on metal or on a dry pin. That is the whole story. You do not need to remove the door for this.
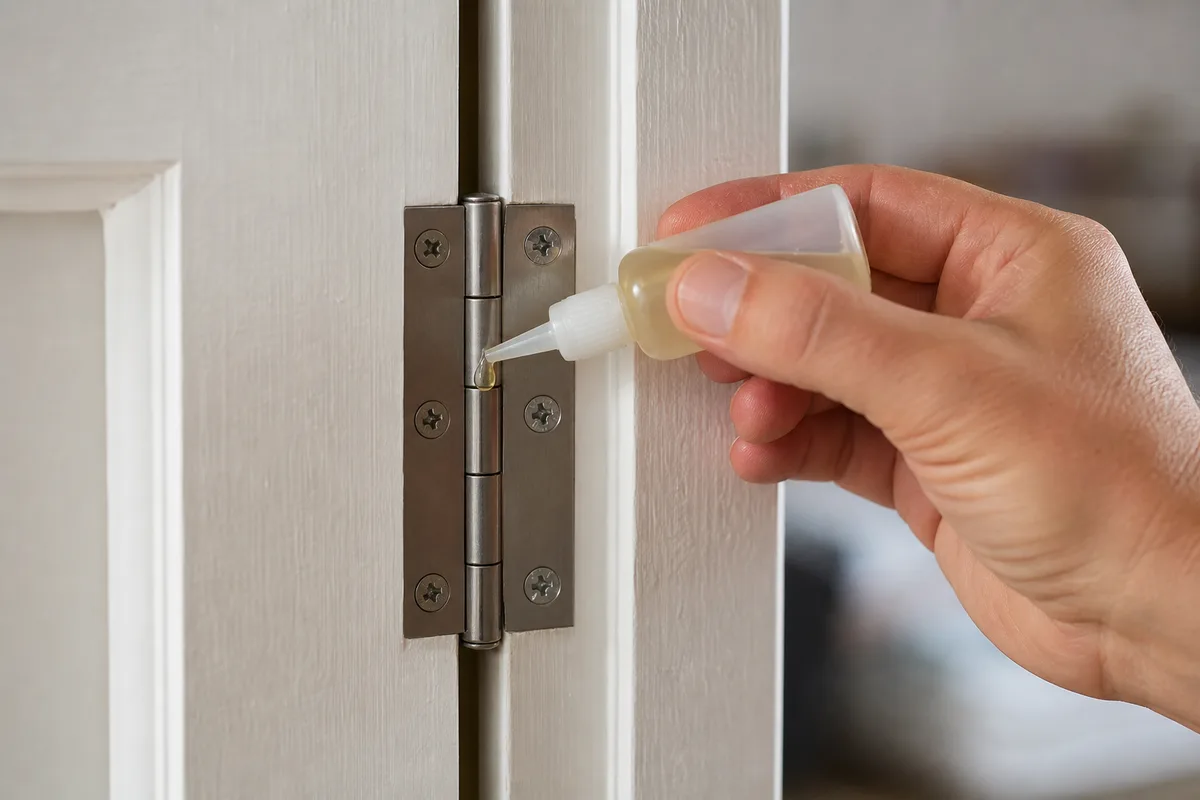
The clean way is to lift the pin partway and get lubricant onto the pin itself, because that is the surface actually rotating. Tap the pin up from below with a nail set or a thin screwdriver and a light hammer tap; you only need to raise it an inch or two, not pull it out. Wipe the exposed pin, put a couple of drops of a light penetrating oil or a dab of grease on it, then work the pin back down and swing the door a dozen times to spread it into the knuckle. Do the middle hinge too even if only one seems to sing, because a squeak has a way of moving next door the moment you think you have won.
A drip applicator earns its keep here. The nozzle lets you put oil exactly on the top of the knuckle and let gravity carry it down through the barrel, instead of spraying a mist over the trim, the wall, and the floor.
A word on what to use. A thin aerosol spray lubricant will silence a squeak in thirty seconds, and for a quick fix that is fine. Its downside is that it is thin, it evaporates and creeps, and the squeak often returns in a few months, plus it runs down and stains the casing if you are heavy with it. A slightly heavier lubricant, an oil with some body or a smear of white grease, stays put far longer, which is why I prefer it on a hinge I would rather not revisit. Avoid anything that dries sticky, because a gummy residue attracts dust and eventually squeaks worse than the dry pin did.
One honest limit: if a hinge still squeaks or feels gritty after lubrication, the pin or the knuckle may be worn or rusted, and no oil fixes worn metal. A single interior hinge is an inexpensive part, and swapping it is four screws with the door supported. Do not keep drowning a corroded hinge in oil hoping it will come back.
The rub: loose screws vs a swollen door
This is where the money gets wasted, so slow down here. A door that drags at the top corner on the latch side is the classic case, and the reflex is to assume the door has grown too big for its hole and needs planing. Most of the time it has not grown at all. It has dropped.
Here is the mechanism. The top hinge carries most of a door's hanging weight, and it does that through a few short screws biting into the edge of the frame. Over years of swinging and the occasional slam, those screws work loose, or they were only ever driven into the soft jamb and never reached the framing behind it. When the top hinge loosens even a little, the whole door tips: the top latch-side corner swings down and inward and starts jamming against the frame, while a gap opens at the bottom of that same side. To the annoyed homeowner it reads exactly like a door that is too big. It is not. It is a door that is hanging crooked.
The test takes ten seconds. Grab the latch edge of the door and lift up firmly while watching the top corner. If the door rises and the rub eases, your problem is loose hinge screws, not size. Now open the door and put a screwdriver on the screws in the top hinge, both the ones in the door and the ones in the jamb. You will usually find at least one that keeps turning without ever snugging up, spinning away with the quiet confidence of a screw that gave up years ago. That stripped screw is your whole problem.
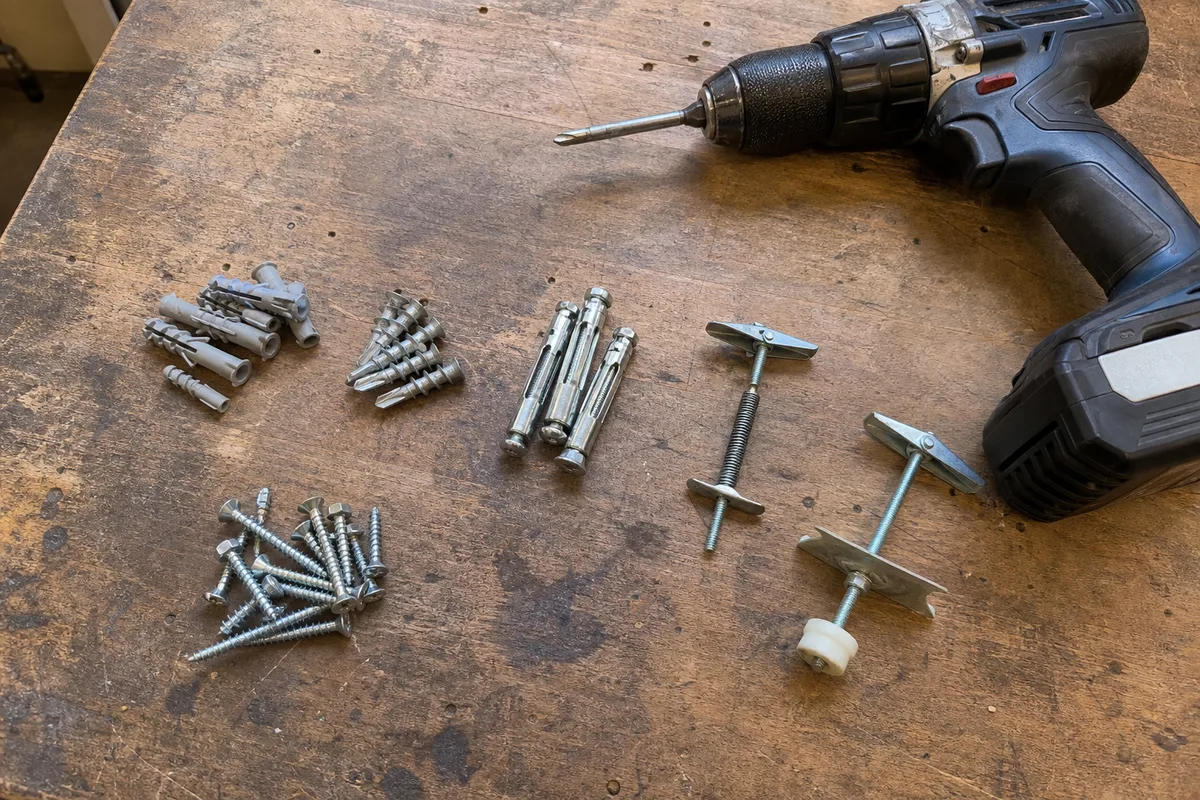
The real fix is not just to crank the old screws, which will strip again, but to reach the framing behind the jamb. Take out one of the loose short screws from the jamb side of the top hinge and drive in a single long screw in its place, one long enough to pass through the jamb and bite two or three inches into the wall stud behind it. As that long screw seats, it pulls the entire door up and back into square, and the top-corner rub often vanishes as you watch. It genuinely is a matter of minutes, no sanding, no door removal.
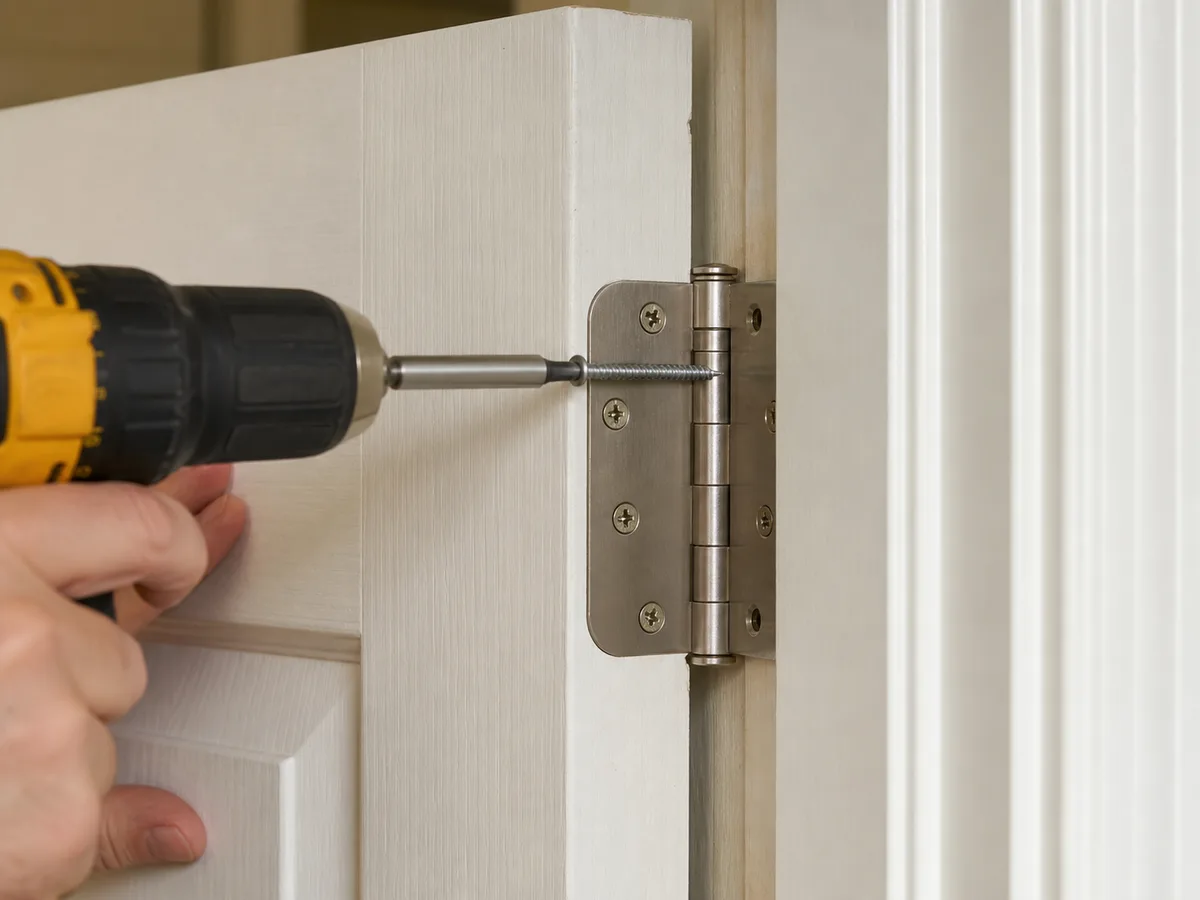 Driving a longer screw into a door hinge to fix sagging
A couple of practical notes. Drive the long screw firmly but stop the moment it is tight; keep cranking past that and you can pull the jamb inward far enough to open a gap on the hinge side, trading one problem for another. If the hole is so chewed out that even a new screw spins, glue a couple of wooden matchsticks or a golf-tee-sized sliver into the hole, let it set, and drive into that. And check all three hinges, because a middle or bottom hinge screw can be loose too.
Only after you have confirmed the hinges are tight and the door still rubs in the same place, every month of the year, do you consider that the fit itself is genuinely wrong and material has to come off. Even then, the rub mark tells you where and how much, which is the subject of a later section. The order matters: screws first, wood last, always.
The latch miss: strike alignment
A door that closes but will not stay closed, or that needs a lift or a shove before the latch clicks, is not a rubbing problem and not a squeak. The latch bolt, the spring-loaded wedge sticking out of the door edge, is missing the hole in the strike plate on the frame. Fix the alignment and the door behaves. Sanding it would do nothing.
Find out which way it is missing. Close the door slowly and watch the latch bolt approach the strike plate. Usually it is hitting high or low: the bolt lands above or below the opening in the plate. A quick way to see it is to rub a little dark pencil lead or a smear of lipstick-style marker on the tip of the latch bolt, close the door against the strike, and open it; the mark transfers to the strike plate exactly where the bolt is striking, so you can see whether you are high, low, or off to one side.
For a small miss, an eighth of an inch or so, you often do not have to move the strike plate at all. Take it off, put it in a vise or clamp it on a solid surface, and file the opening a touch larger in the direction you need, usually downward if the door has settled. A few strokes with a metal file opens enough room for the bolt to seat. Reinstall and test.
For a bigger miss, move the strike plate itself. Unscrew it, shift it up or down to line up with where the bolt actually lands, and screw it back. This usually means the old screw holes no longer line up, so plug them with a sliver of wood and glue, let it set, then drill fresh pilot holes in the new position. If the misalignment came from the door dropping, notice that fixing the hinge as in the section above may bring the latch back into line on its own, which is one more reason to square the hinges before you start moving strike plates around. The mechanics of how the bolt and strike work together, and why a deadbolt has its own separate alignment to keep happy, is worth understanding in its own right if you want the full picture of how door locks and deadbolts work.
One judgment call: if the latch catches fine in winter and misses only in humid months, treat it as a swelling problem, not an alignment one, and be cautious about filing the strike to chase a gap that will close again when the wood dries. Filing metal is permanent the same way planing wood is.
When to plane, and how much
Planing is the last resort, not the first move, and by the time you are genuinely here you have already confirmed three things: the hinges are tight and reach the stud, the strike is aligned, and the rub is present in the dry season too, so it is not seasonal swelling. If any of those is not true, put the plane down and go back. Wood removed for the wrong reason is gone for good.
When planing really is the answer, the rub mark does the measuring for you. That shiny, burnished streak on the edge is the only part that is oversized. Trace it with a pencil, add a hair on each end, and that pencil line is your entire work area. You are removing a specific half inch or so of high spot, not reshaping the whole edge. Most sticking doors that truly need it need something like a sixteenth of an inch taken off a limited stretch, no more. If you find yourself wanting to remove an eighth of an inch down the entire height, stop, because that is almost never a fit problem and almost always a hinge or swelling problem you have misread.
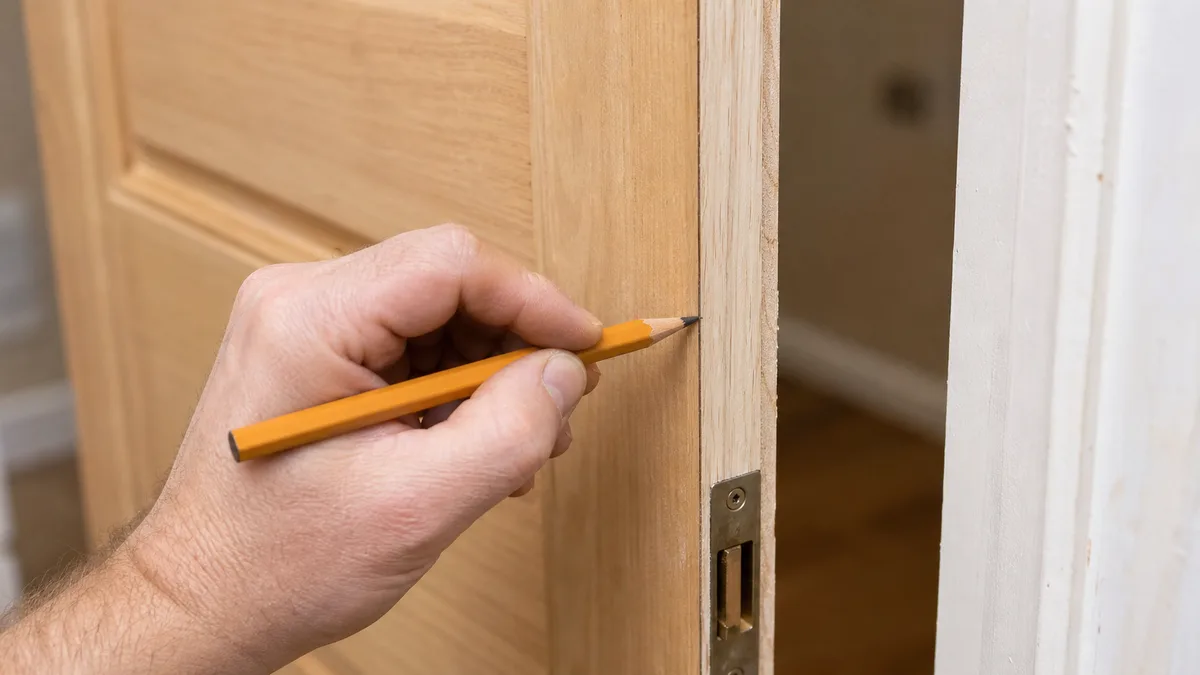 Marking a door edge with a pencil before planing
Take the material off the hinge edge when you reasonably can, not the latch edge. The hinge edge is less visible, it does not carry the latch hardware or the bevel, and reworking it disturbs less. If the rub is clearly on the latch side and near the top, remember one more time that this is the exact signature of a dropped door from loose hinges; be sure you have ruled that out. Where the drag is along the bottom against the floor or a threshold, you may be better off pulling the door and trimming the bottom rather than planing an edge, and a saw with a straightedge does that more cleanly than a plane.
Work in shallow passes and check often. Set the plane for a thin shaving, go with the grain, keep the tool square to the face so you do not round the edge over, and stop to rehang and test after every few passes rather than trying to nail it in one go. A door you can always take more off, so sneak up on the fit. When it swings clear with an even reveal, you are done, and you seal the bare wood you exposed with a coat of primer or paint so it does not soak up moisture and swell right back into the frame. Leaving a planed edge raw is how a summer fix turns into a worse summer problem the following year.
Know the limit, too. If the door is badly warped, twisted so it only touches the frame at two diagonal corners, planing will not straighten it, and you are into replacing the slab rather than trimming it. A plane fixes a door that is the wrong size, not a door that is the wrong shape.
Seasonal swelling and how to live with it
The most misdiagnosed door of all is the one that sticks in August and swings free in January. That door is not broken. It is doing exactly what wood does: taking on moisture from humid air, growing a little across its width, and pressing into the frame until the humidity drops and it shrinks back. Understand that and your best move is often to do almost nothing to the wood.
The mistake I see most is planing this door in the month it sticks. It feels satisfying, the drag goes away, and then the dry heating season arrives, the door shrinks to its winter size, and now you have a permanent gap on the swing side that lets in drafts and light and rattles when the furnace kicks on. You solved four humid months by ruining eight dry ones, which is not the trade anyone thinks they are making at the time. If a door sticks only seasonally and clears on its own, the honest answer is that it may not need cutting at all.
When the seasonal drag is mild, live with it, or take the gentlest possible action. Lubrication of the rubbing edge helps a surprising amount: a rub of paraffin, a plain candle, or a bar of soap along the sticking stretch of the edge lets the door slide past the tight spot instead of grabbing. It is reversible and removes no wood. Keeping the door edges sealed with paint on all six sides, including the top and bottom edges people always forget, slows how fast the wood drinks in humidity in the first place, so a well-sealed door swells less than a bare one.
If a seasonal door sticks so hard in the worst weeks that it will not close, and you have decided you truly must relieve it, then relieve it for the swelling, not for the peak. Take off only enough to clear the drag at moderate humidity, accept a slightly tighter fit in the very wettest stretch, and know you may see a small gap at the driest. That is the compromise a seasonal door forces, and there is no setting that is perfect in both extremes because the door itself is not the same size in both. Managing the room's humidity, keeping it steadier through the year, does more for these doors than any amount of planing, because it treats the actual cause instead of chasing the symptom around the calendar.
The through-line across all of this is the same discipline the whole subject rewards: look before you cut, let the door tell you which of the three problems it has, and reach for the reversible fix, the oil, the screw, the file, the bar of soap, before the one you can never take back. Do that and most squeaky, sticking, miss-latching doors in a house turn out to be ten-minute jobs, not projects.