Most raised beds fail the same way. Two or three seasons in, a corner pops loose, the long sides bow out under the weight of wet soil, and the whole thing goes from a crisp rectangle to a tired parallelogram sagging into the lawn. Nobody sets out to build a parallelogram. The wood is usually fine. What gave way was the way it was put together, and the fact that nobody thought about how long the wood was actually going to last before they filled it with a quarter ton of dirt.
A raised bed is one of the simplest things you can build, which is exactly why people rush the two decisions that decide whether it lasts one season or ten. Those two decisions are the wood you choose and how you join the corners. Get those right and the rest (sizing, filling, the first year of care) is straightforward. I am going to walk through the whole build, but I am going to spend the most time on the parts that actually determine lifespan, because that is where the difference between a bed you build once and a bed you rebuild every few springs lives. If you are still deciding where a bed fits in the bigger picture of your yard, the overview on starting a home garden is the place to zoom out first; this article assumes you have picked your spot and want to build the box well.
Why raised beds are worth the build
Before you spend a Saturday and a hundred-odd dollars on lumber, it is worth being honest about what a raised bed actually buys you, because it is not magic and it is not always the right answer.
The real advantage is control. When you build a box and fill it, you decide what the soil is instead of fighting whatever the yard handed you. If your native ground is heavy clay that stays wet for days after rain, or thin compacted fill left behind by a builder, a raised bed lets you sidestep the problem entirely rather than spending years amending it. That is the single biggest reason I build them: the fill in the box will drain and warm up faster than the ground around it, and in spring a raised bed is workable a week or two before the surrounding soil dries out enough to touch.
The second advantage is that the edges do work for you. A defined border keeps grass and creeping weeds from marching in the way they do at the edge of an in-ground row, and it stops the soil from washing out flat every time it rains hard. The bed stays a bed instead of slowly melting back into lawn.
There are honest limits, though. A raised bed dries out faster than the ground, which is a benefit in a wet spring and a liability in a dry July. You will water more often than you would an in-ground plot, sometimes every day in real heat. It also costs money and a day of work up front, where a dug row costs almost nothing. And it does not fix a bad location: a bed in deep shade grows the same disappointing crops a shaded in-ground row would. So the build is worth it when your soil or drainage is the problem, or when a clean defined space genuinely helps you keep up with the garden. It is not worth it just because the photos look nice. If you have not settled the layout question yet (how many beds, how far apart, where the paths go), work through planning a backyard vegetable bed before you start cutting wood, because the size and number of beds is much easier to change on paper than in lumber.
Choosing wood for the lifespan you want
This is the first of the two decisions that decide everything, and it comes down to a plain trade-off between what you spend now and how many years you get.
Untreated softwood (standard construction-grade pine, spruce, or fir, the cheap dimensional lumber stacked at every yard) will build you a perfectly good bed that lasts roughly 3 to 5 years before the boards touching the soil start to go soft and punky at the bottom edge. It is inexpensive, it is easy to cut and screw, and for a lot of people that is the right call, especially for a first bed when you are not sure you will want it in the same place in five years anyway. There is no shame in a pine bed. You just have to know going in that you are building something with an expiration date, and not act surprised when it arrives.
Cedar is the other common choice, and it is the one I reach for when I know a bed is staying put. Naturally rot-resistant heartwood cedar will give you something on the order of 10 to 15 years in contact with damp soil, three times the life of pine. The catch is the price: cedar routinely runs two to three times the cost of the equivalent pine boards, and on a bed that takes a fair bit of lumber that gap is real money. So the honest way to choose is to match the wood to how long you actually want the bed there. A permanent bed in a spot you have committed to is worth cedar's premium, because rebuilding a bed you have already filled with good soil is a miserable job. A trial bed, or one you might move once you see how the sun tracks across the yard, does not justify it. Build it from pine, learn what you want, and spend on cedar later.
A few notes on the wood itself, whatever species you pick. Buy the thickest boards you can reasonably afford: a 2-inch-thick board (a nominal "2-by") resists bowing far better than a 1-inch board and will not cup and warp the way thin fence pickets do once one face is wet soil and the other is dry air. Avoid boards with the pith, the dead center of the tree, running through them, because those twist as they dry. And steer away from any reclaimed lumber whose history you do not know, along with older pressure-treated wood, since what is in it is exactly the kind of unknown you do not want leaching next to food crops. Modern ground-contact treated lumber is considered safe by its makers for garden use, but plenty of gardeners prefer to keep treated wood out of a food bed on principle, and cedar sidesteps the question entirely.
Sizing: width, length, and depth
Get the dimensions right and the bed is a pleasure to work in for a decade. Get them wrong, mostly by building too wide, and you will fight it every single season.
Width is the number that matters most, and there is a firm rule behind it: build no wider than 4 feet. The reason is reach. A 4-foot width lets you reach the middle from both sides, about 2 feet of reach from each long edge, without ever putting a foot inside the bed. The moment a bed is wider than that, you cannot tend the center without stepping in, and every time you step in you compact the loose soil you spent money and effort building, squeezing out the air and drainage that were the whole point of the raised bed in the first place. If the bed will sit against a wall or fence where you can only reach it from one side, cut that width in half: 2 feet, so the far edge is still an arm's length away. Four feet is the ceiling, not a target: narrower is fine, wider is a mistake you get to regret every week for a decade.
Length is the free dimension; you can make it whatever suits the space and the lumber. Standard boards come in 8-, 10-, and 12-foot lengths, so an 8-foot or a 4-by-8 bed uses material with little waste, which is why that size is so common. Longer than about 8 feet and you will want a cross-tie or a center stake to keep the long sides from bowing outward under the push of wet soil (more on that in the corners section) because a 12-foot span of 2-inch board will slowly belly out without support.
Depth is more forgiving than people fear. For most vegetables, a bed 10 to 12 inches deep of good fill is plenty, because the majority of what you will grow (lettuces, beans, tomatoes, most herbs) does the bulk of its rooting in the top foot. That usually means two stacked 2-by-6 boards, or a single wide board, per side. You only need to go deeper, 16 to 18 inches, if you are growing long root crops like full-size carrots or parsnips, or if you are building over solid paving where roots cannot reach down into the ground at all. If your bed sits on open soil, the plants will send roots down past the box into the earth below, so the box depth is a starting volume, not a hard ceiling.
Tools, fasteners, and cut list
You do not need a workshop for this. A raised bed is squarely within reach of basic tools, and the fastener choice matters more than the tool list.
For tools, the short version is: a drill/driver, a saw, a tape measure, a square, and a level. If the yard will cut your boards to length for you (most will, often for a small fee or free), you can skip the saw entirely and do the whole build with a drill, a tape, a square, and a level. A power drill/driver is the one tool I would not do without, because you are going to drive a lot of screws and pre-drill a lot of holes, and doing that by hand turns a two-hour job into an afternoon you will remember for the wrong reasons. A speed square or any framing square is what keeps your corners at a true 90 degrees, and a level checks the box sits flat once it is sited.
Fasteners are where beds quietly succeed or fail, so do not economize here. Use exterior-rated screws, coated deck screws or stainless, not drywall screws and not plain interior screws, because ordinary steel screws rust through in wet soil within a couple of seasons and then the corner lets go even though the wood is still sound. This is a classic false economy: the screws are the cheapest part of the whole build, and the wrong ones cost you the bed. For a bed made of 2-inch boards, 3-inch exterior screws are the right size. Skip nails entirely; nails work loose as the wood swells and shrinks through wet and dry cycles, where screws hold their bite. If you want extra insurance at the corners, galvanized or stainless corner brackets on the inside add stiffness, though good screwing into a corner post makes them optional.
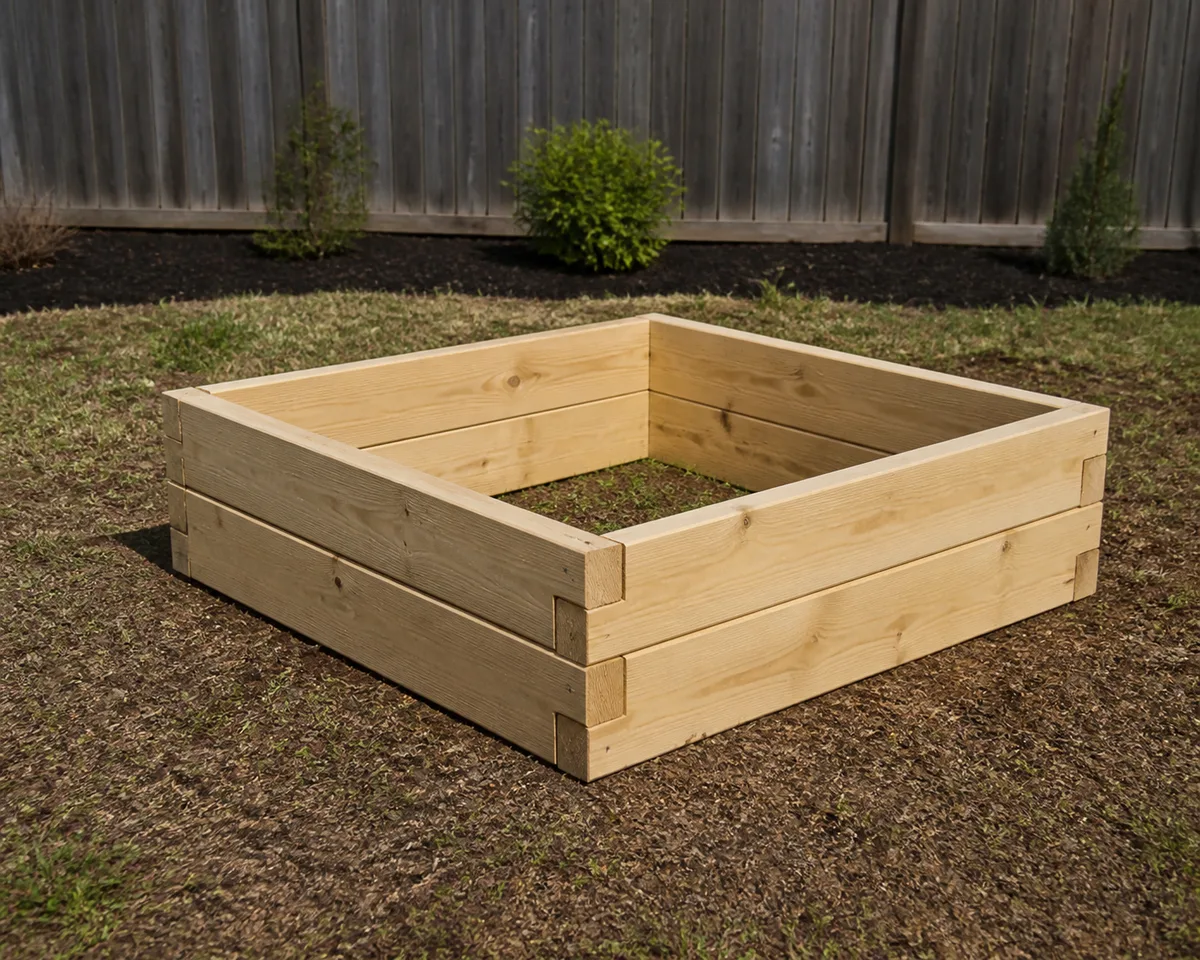
A cut list for a standard 4-by-8 bed, two boards high, looks like this. Sides: four boards at 8 feet for the two long sides stacked two high, and four boards cut to 4 feet (or slightly under, depending on how you join the corners) for the two ends. Corner posts: four lengths of 4-by-4 or doubled 2-by material, cut to the finished height of the bed, which the side boards screw into. Buying one or two extra boards is cheap insurance against a bad cut or a badly warped board you would rather not use. Lay it all out and sight down each board before you build; set aside any that are noticeably bowed or twisted for the short end cuts where a slight warp matters less.
Building square, stable corners
Here is the second decision that decides the bed's life. A raised bed does not usually fail in the middle of a board; it fails at the corners, where the joint carries all the outward force of the soil. Build the corners well and everything else forgives you.
The strongest and simplest corner uses a post. Cut a length of 4-by-4 (or two pieces of 2-by screwed together into an L) to the full height of the bed, stand it inside the corner, and screw both side boards into it. Now each corner has a solid block of wood behind it holding the two sides together, instead of the sides just butting against each other and relying on screws driven into the thin end grain of a board, which is the weak joint that pulls apart. The post also gives you something to drive down into the ground later for extra anchoring. This single detail, a real post at each corner, is the biggest difference between a bed that stays square and one that racks out of shape.
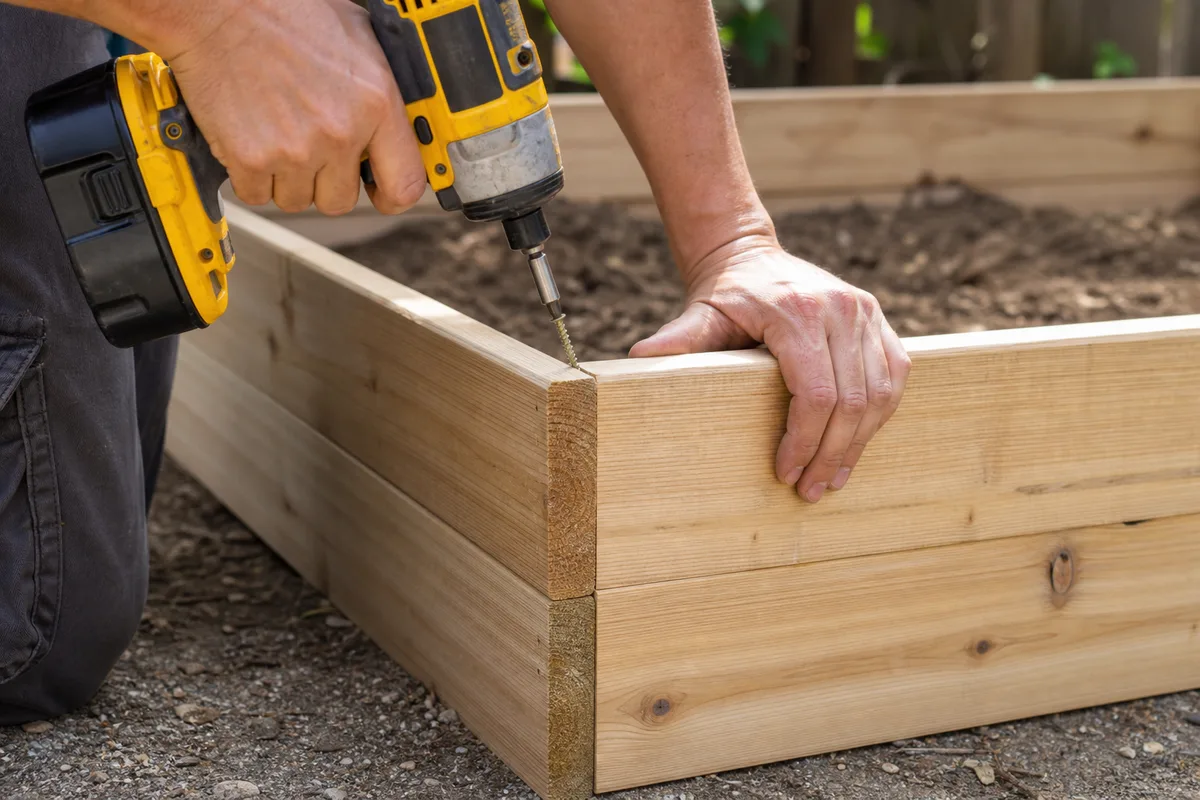 Assembling the corner of a raised garden bed frame with a drill
Whatever joint you use, pre-drill your screw holes near the ends of boards. Softwood and cedar both split when a screw is driven into the last inch or two of a board without a pilot hole, and a split corner is a failed corner. A pilot hole a hair smaller than the screw's shank takes ten extra seconds and prevents the split entirely. Drive at least two screws into each board-to-post connection, spaced apart top and bottom, so the joint cannot pivot on a single screw.
Getting the box actually square, not just roughly rectangular, is worth the two minutes it takes to check. Assemble the frame, then measure the two diagonals corner to corner. When those two measurements are equal, the box is a true rectangle with 90-degree corners. If they differ, push the longer diagonal's corners inward until they match, then fix your corners. The tape measure does not care how square it looked to your eye, and it is right. A square box sits flat, its lid-line stays even, and the whole thing looks built rather than thrown together. An out-of-square box rocks, gaps at the joints, and stresses the corners unevenly.
For any bed longer than about 8 feet, add a cross-support. The weight of wet soil pushes the long sides outward, and over a season or two an unsupported 10- or 12-foot side will bow into a visible curve. A simple wooden cross-tie screwed across the top from one long side to the other at the midpoint, or a stake driven deep against the outside face of each long side, takes that push and keeps the sides straight. On a standard 4-by-8 bed you can usually skip this; on anything longer, do not.
Leveling and siting the bed
A bed that is not level looks fine empty and then betrays itself the moment you water it: the water runs to the low end, the plants at the high end go dry, and the soil slowly migrates downhill without asking permission. Ten minutes of leveling before you fill saves you a season of uneven watering.
Set the assembled frame on your chosen spot and lay a level across the top edge, checking both directions, along the length and across the width, and then diagonally. Ground that looks flat to the eye is rarely flat to a level; most yards slope more than you would guess.
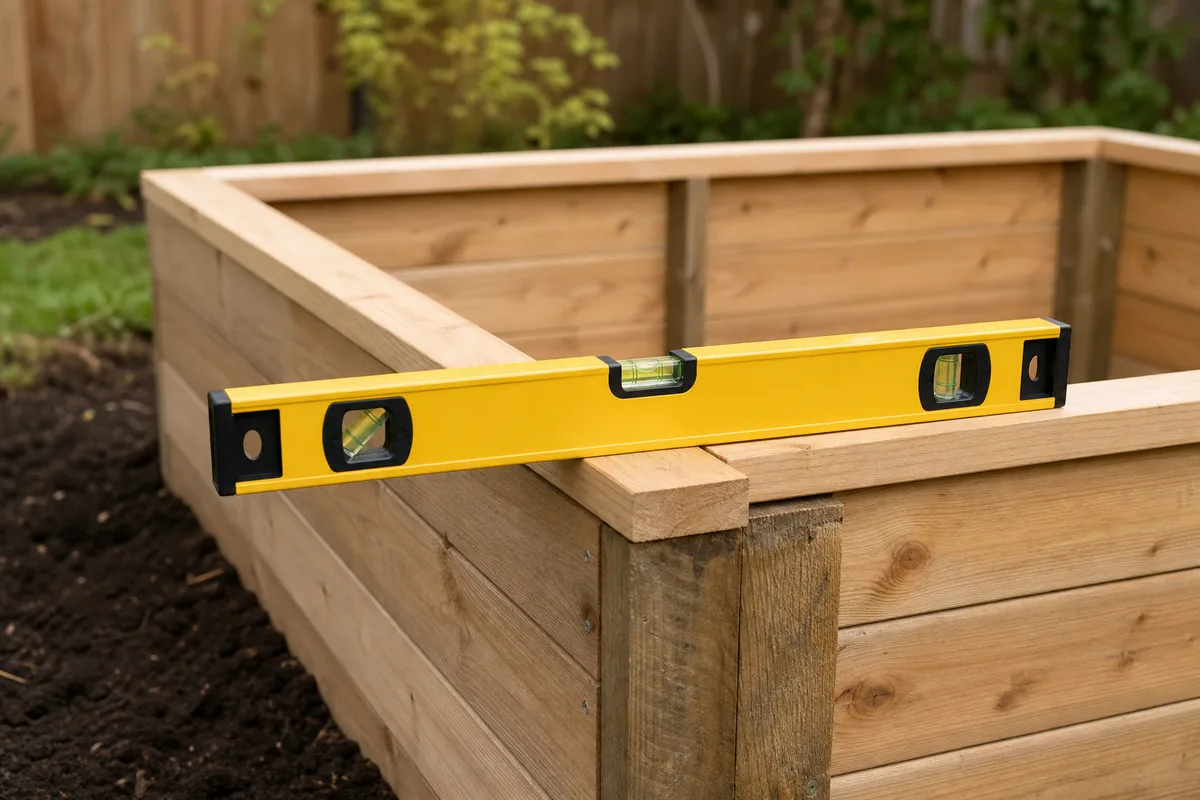 Checking a raised garden bed frame is level during the build
You level a bed by digging down at the high end, never by packing soil up under the low end. Slide the frame aside, skim off the sod and a little soil where the high corner sits, set the frame back, and re-check. Repeat until the level reads true all the way around. Packing fill under the low side seems faster but it settles unevenly under the weight of a full bed and the bed goes crooked again within weeks; cutting the high side down gives you solid, stable ground under the whole frame that will not shift.
While the frame is off the spot, deal with what is underneath. If you are building over grass, you have two good options: strip the sod off entirely, or lay down a layer of plain cardboard or several sheets of newspaper across the whole footprint before you set the frame back and fill. The cardboard smothers the grass, breaks down within a season, and lets roots pass through into the soil below. It is the easier of the two and works well. Avoid plastic sheeting on the bottom; it traps water and blocks the drainage and the deep rooting that are half the reason to build a bed on open ground in the first place. The only time a solid bottom makes sense is a bed on a hard patio or deck, and that is a different build with drainage holes and a liner.
For siting itself, the non-negotiable is sun. Most vegetables want a good long stretch of direct sun each day, so watch your chosen spot across a full day before you commit. The shade from a fence or a tree that looks minor at noon can swallow the bed morning and evening. Put the bed within reach of a hose or a water source, because you will be watering it often, and orient a long bed so one long side is easy to reach from your main path. Once it is filled, the bed is not moving, so it is worth getting the spot right while the frame is still light enough to lift.
Filling it without overpaying for soil
This is where a raised bed quietly gets expensive, and where a little knowledge saves you real money. Filling a 4-by-8-by-1-foot bed entirely with bought bagged soil takes a startling number of bags, and doing it that way is the single biggest cost of the whole project, often more than the lumber. You do not have to fill it that way.
The trick is to fill the bottom third of the bed with coarse organic matter instead of bought soil. Branches, twigs, chopped-up prunings, small logs, fallen leaves, straw, grass clippings, the woody stems from last year's garden. Layer that bulky material into the bottom third of the box, and you cut the bought-soil cost by roughly a third without hurting most crops. The plants root mainly in the upper foot, so the top two-thirds is what needs to be real growing soil; the bottom third just needs to hold that up, hold moisture, and slowly break down. As that woody layer decomposes over the following years it turns into more soil and feeds the bed from below, so it is not a compromise so much as a head start.
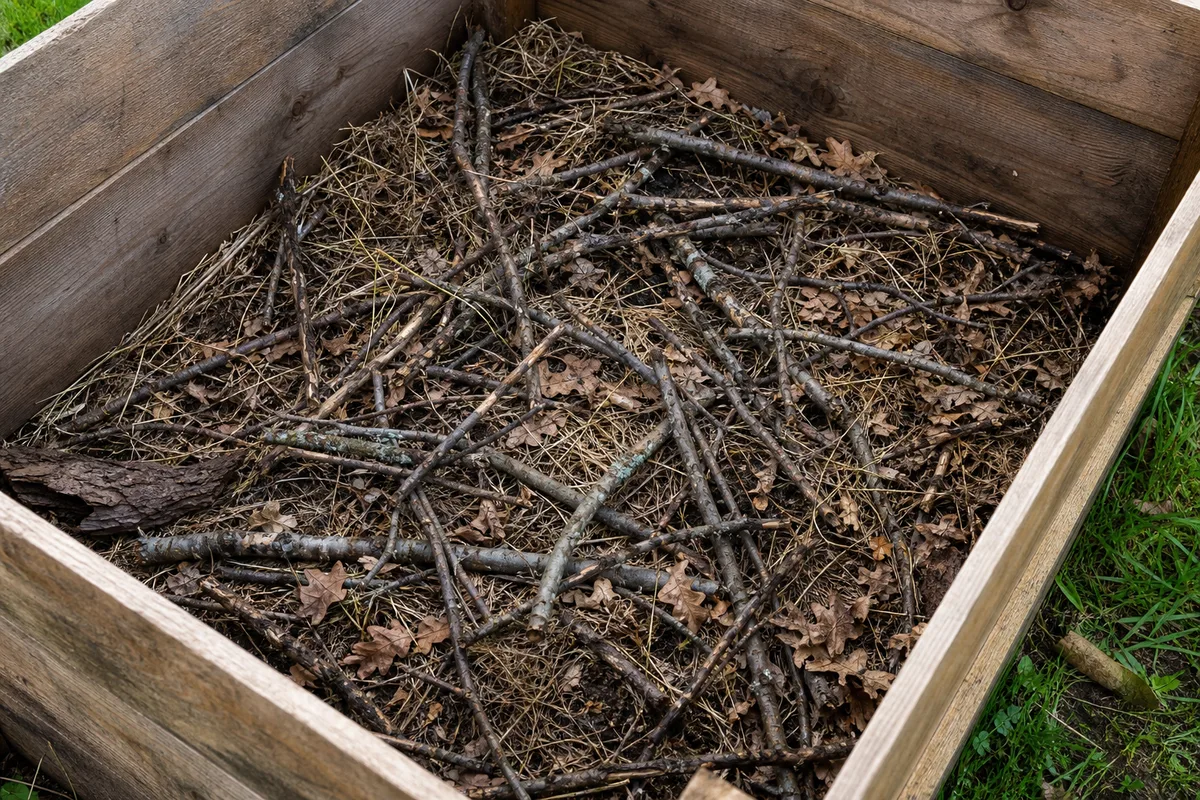 Layering coarse organic matter in the base of a raised garden bed
There is one thing to know about that layer: fresh wood pulls nitrogen out of the surrounding soil as it starts to break down, which can leave the first season's plants a little hungry. You offset it by keeping the woody material in the bottom third only, well below the root zone, and by mixing plenty of finished compost and a nitrogen-rich material into the top layer where the roots actually are. Do not fill the whole bed with wood and expect to plant into it; that is a brush pile with ambitions, not a garden bed. The bottom third is the budget layer; the top two-thirds is where you spend.
For that top two-thirds, a workable mix is roughly equal parts good topsoil or garden soil and finished compost, blended rather than layered so roots meet the same soil throughout. The compost brings the life and the nutrients; the soil brings the body and the water-holding. Buying in bulk by the cubic yard from a landscape supplier is dramatically cheaper than bagged product once you need any real volume. A single 4-by-8 bed can eat most of a cubic yard, and bulk soil often costs a fraction per volume of the bagged equivalent. To size your order, the raised bed soil calculator turns your bed's dimensions into cubic feet, cubic yards, and a bag count, and it accounts for the bottom-third fill trick. If you understand why the soil behaves the way it does (why some fill drains through in minutes and some stays soggy, why compost changes how a bed holds water), the piece on how soil holds water and nutrients explains the mechanism, and it will make you better at judging a soil mix by feel instead of guessing.
Fill the bed a little proud of the top edge, because fresh fill always settles. A bed filled level with the rim will sink an inch or two within the first few weeks as the material compacts and the organic matter begins to break down, so mound it slightly and plan to top it up after the first watering-in and again after the first month.
First-season care of a new bed
A new bed behaves a little differently from an established one, and knowing what to expect in that first year keeps you from misreading normal settling as a problem.
Expect it to sink. As the fill settles and the bottom layer starts breaking down, the soil level will drop, sometimes noticeably. This is normal, not a failure. Keep a reserve of compost or soil on hand and top the bed up once or twice through the first season as it settles, especially after heavy watering compacts the fresh mix. By the second year the settling largely stops and you are just adding a maintenance layer of compost each spring.
Watering is the thing that catches people out with their first raised bed. Because the bed drains fast and its sides are exposed to the air, it dries out faster than in-ground soil. A raised bed in real summer heat can need water every day, sometimes twice, where a garden row might go two or three days. The best habit is to check by hand rather than by clock: push a finger a couple of inches into the soil, and if it is dry at your fingertip, water; if it is still damp, wait. Water deeply and less often rather than a light sprinkle daily, so the moisture reaches down and the roots follow it down instead of clustering at the dry surface. A layer of mulch (straw, shredded leaves, or bark) across the surface after planting slows that drying dramatically and is worth the small effort, cutting how often you have to water and keeping the surface from crusting.
Do not overplant the first year while you are still learning how much water and attention the bed demands. A new gardener with a new bed has two unknowns at once; keeping the planting modest lets you learn the bed without a jungle to keep alive. Give the fresh fill its first season to settle and mellow, watch how the sun actually falls across it through the growing months, and note which corners dry out first and which stay damp. Those observations are what turn a box of soil into a bed you know.
One honest caution to close on: even a well-built cedar bed is not permanent, and even a good build will eventually need a corner re-screwed or a settled bottom board checked. Look the frame over each spring when you add compost: press on the corners, sight down the long sides for any bow, and catch a loose screw before it becomes a sprung joint. A few minutes of that each year is what carries a bed from "lasts a season" to lasting as long as the wood you chose can possibly give you. Build the corners with posts, put it on wood that matches how long you want it there, keep a foot out of the middle, and fill it smart. Do those four things and the bed you build this weekend will still be square and standing long after the ones your neighbors rushed have gone soft in the corners.