Most gardeners buy their second pair of pruners because the first pair failed them in a way they could not name. They only knew the cuts had gone bad. The stems came away frayed instead of clean, roses developed brown crushed collars where the cut should have been smooth, and every snip took more squeeze than it used to. That pair of bargain pruners did not wear out so much as it fell out of alignment, and the difference between those two failures is the whole story of how to buy the next pair well.
I have bought cheap pruners, treated them badly, and thrown them out when the spring shot off into the mulch and politely declined to be found again. I have also kept one mid-price pair going for the better part of a decade by doing almost nothing except sharpening and oiling it. That gap in outcome had far more to do with maintenance and the type of tool than with the price on the tag. This article walks through the decisions that actually matter, in the order they matter, and it is honest about where spending more stops buying you anything.
The crushed-stem problem
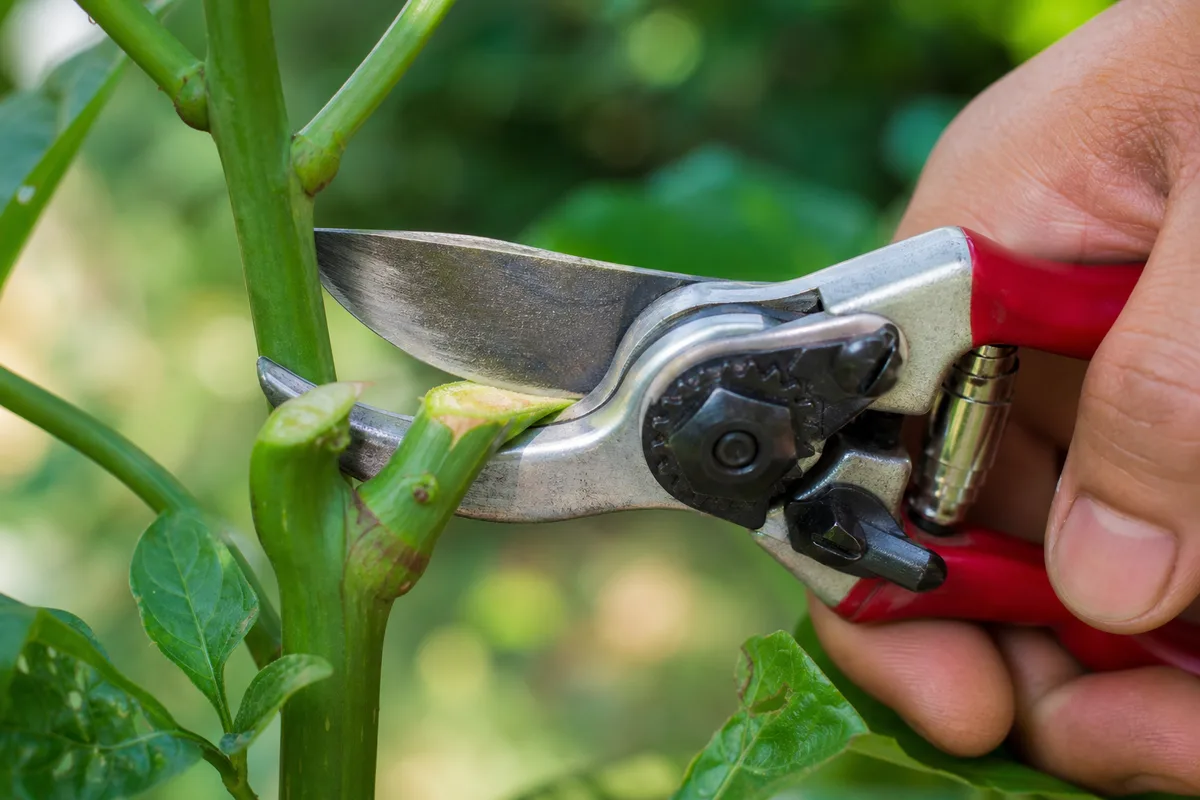
Start with the symptom, because it tells you what to look for. When a cut on a living green stem looks torn, stringy, or pinched flat, one of two things is happening, and they call for different fixes. Either the blade is dull, or the blade and the hook have sprung out of alignment so they no longer pass each other closely. People assume dullness first and reach for a sharpener, because sharpening is the fix that feels like progress, but on a cheap pruner that has been used to cut something too thick, misalignment is the more common cause, and no amount of sharpening will fix it.
Here is why. A proper cut on green wood works like a pair of scissors: two edges slide past each other with almost no gap, and the stem is severed before it can be squashed. When you force a hand pruner through a branch above its rated diameter (for most hand pruners that limit is around 3/4 inch of green wood) the cutting blade gets levered sideways against the hook. The pivot bolt loosens a hair, the blade twists a fraction of a millimeter off its track, and now the two edges no longer meet cleanly. They meet with a gap. A stem caught in that gap gets pressed and torn rather than sliced. That misalignment, not dullness, is why so many inexpensive pruners tear.
The reason this matters for buying is that a good pruner resists it and a bad one does not. A quality tool has a pivot you can snug back down and blades hard enough to hold their geometry; a sealed bargain tool has a riveted pivot you cannot adjust and soft steel that bends on the first oversized cut. So when you evaluate a pruner, you are really asking two things: how well does it cut when new, and how easily can I bring it back when it drifts? A crushed stem on a plant is not just cosmetic either. A clean cut closes over faster and gives disease less of a ragged doorway, which is one more reason the tool is worth getting right rather than muscling through with whatever tears the least.
Bypass vs anvil, and what each is for
The single most useful thing to understand before you spend a dollar is the difference between the two cutting actions, because it decides most of the rest.
A bypass pruner works like scissors. A sharp curved blade sweeps past a thicker, blunt hook, and the two bypass each other closely. Because the sharp edge slices all the way through before the stem is pinched, a bypass pruner makes a clean scissor cut on living stems. That clean cut is exactly what green growth wants, which is why, for the great majority of garden work, bypass is what most gardeners actually need.
An anvil pruner works differently. A single sharp blade comes straight down onto a flat bed, the anvil, usually a strip of softer metal or hard plastic. The blade does not pass the anvil; it stops against it. That means the stem is pressed between edge and flat until it splits. On a dry, dead branch that is perfectly fine, and the straight-down action actually gives an anvil pruner a bit more brute force for the same hand effort. But on a living green stem, the crushing action is the whole problem. The anvil pinches the stem flat on the underside even as the blade cuts the top. It leaves the crushed collar that bypass avoids.
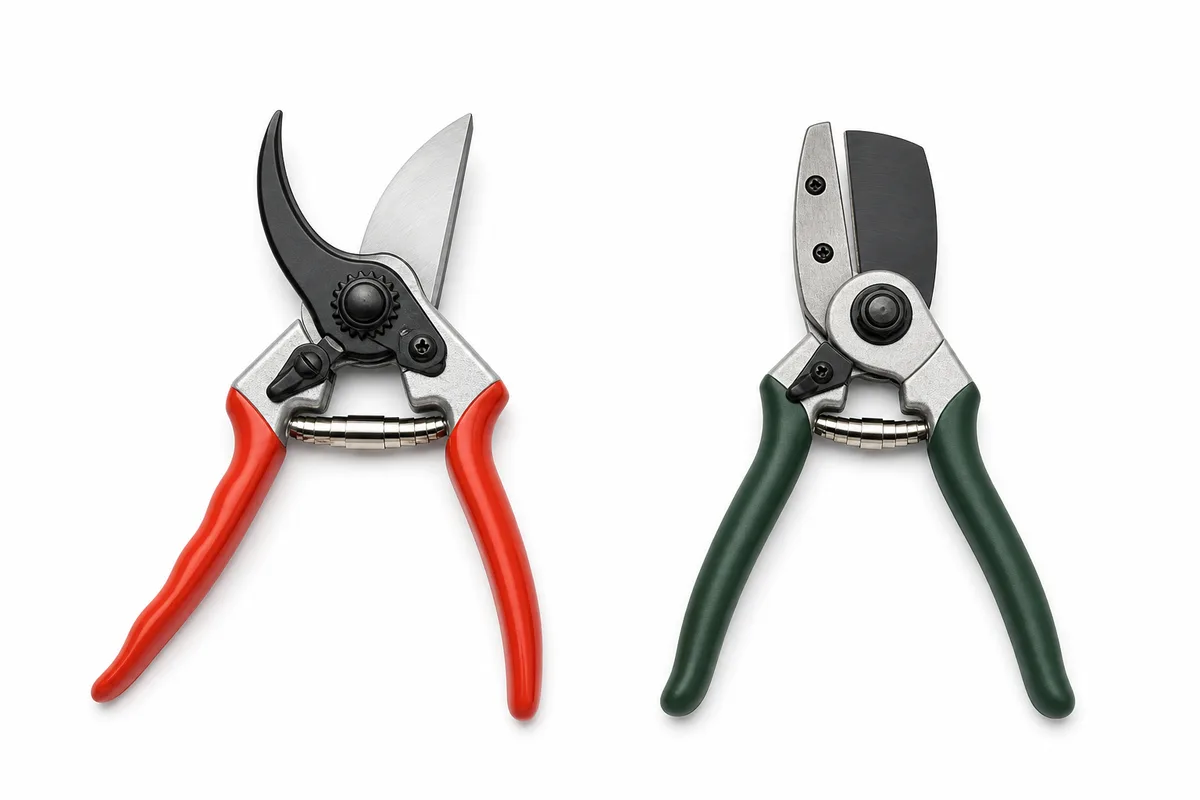 Bypass and anvil hand pruners compared side by side
So the honest rule is: bypass for living wood, anvil for deadwood. If you are shaping shrubs, cutting roses, deadheading, taking soft green prunings, thinning perennials, or harvesting, anything alive, you want bypass. If your work is mostly hacking back dead, dry, woody material, an anvil earns its place and its extra shove. Most home gardeners spend nearly all their pruning time on living plants, which is why, if you own only one pair, it should be bypass. An anvil is a fine second tool for a specific job, not the general-purpose choice. There is a third style, the ratchet pruner, which cuts in stages to multiply force. I mention it only to set it aside: it helps with thick dead wood and is genuinely slow and fiddly on the volume of light green cuts a normal yard produces. For most gardens it solves a problem you do not have.
Sizing to what you actually cut
Every hand pruner has a rated maximum cutting diameter, and it is the number people ignore most and pay for most. For typical bypass hand pruners that limit sits around 3/4 inch of green wood, sometimes a touch less on smaller models. Anything at or below that line is the tool's job. Anything above it is not, and forcing it is exactly how you spring the blades out of alignment and create the crushed-stem problem from the first section.
The practical mistake looks like this. You are cutting through a shrub, most stems are pencil-thick and cut fine, and then you hit one that is closer to an inch. Instead of switching tools, because walking back to the shed for the lopper feels like admitting defeat, you clamp the pruner on it and lever back and forth, twisting the handles to work through. That twisting is the alignment killer. One inch-thick branch muscled through with a 3/4-inch pruner can undo the tool in a single cut. The fix is not a stronger squeeze; it is a bigger tool. Branches from about 3/4 inch up to an inch and a half are the job of a lopper, the long-handled version, and anything thicker wants a pruning saw. Knowing where your hand pruner stops is as much a part of using it well as knowing how to hold it.
This also shapes what to buy. If your garden is mostly perennials, roses, and soft shrubs, a standard-sized bypass pruner rated to about 3/4 inch is right. If you have a lot of stems near that upper limit, you are better served buying a slightly larger-capacity pruner than buying a small one and abusing it. And if you find yourself constantly wishing for more capacity, that is the signal you need a lopper alongside the pruner, not a heavier-duty hand pruner. A pruner sized honestly to its work lasts; one that is always being asked to do a lopper's job fails early no matter what you paid.
Blade steel and sharpening
Blade material sounds like a specification-sheet detail, but it comes down to a simple trade-off you can feel in your hand. Harder steel holds an edge longer and cuts cleaner, but it is more work to sharpen and more brittle if you drop it or twist it. Softer steel is easier to touch up but dulls faster. Most decent bypass pruners use a high-carbon steel blade, sometimes with a coating to resist sap and rust. The coating helps sap slide off rather than gluing up the pivot, which matters more than people expect, because a gummed-up pivot drags and makes a sharp blade feel dull.
Whatever the steel, a pruner blade is a consumable edge, and this is the part buyers underestimate: even a good pruner needs sharpening. No blade stays keen through a season of cutting. The good news is that sharpening a bypass pruner is genuinely easy, because only one edge is beveled (the sharp blade) and you only touch that one. You do not sharpen the hook. A small diamond file or a carbide sharpener, drawn along the existing bevel angle at a consistent stroke direction, brings the edge back in a couple of minutes, which is about as close as garden maintenance gets to instant gratification. The move is to follow the bevel the factory ground, usually somewhere around 20 to 30 degrees, and to file in one direction from the base of the blade to the tip, not back and forth. A few passes, wipe off the burr on the flat back of the blade, and the scissor action returns.
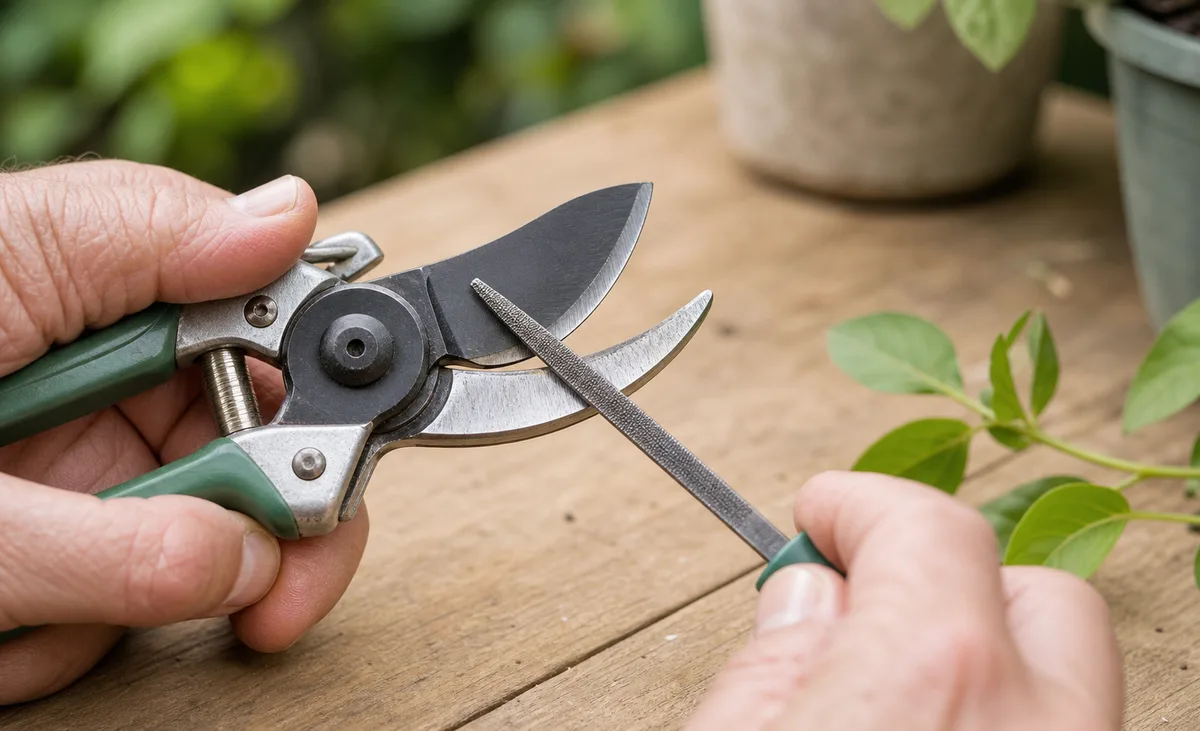 Sharpening a hand pruner blade with a file
The reason this matters for choosing a pruner is that a tool built to be maintained rewards this and a sealed one fights it. On a good pruner you can also disassemble it to sharpen and to clean sap out of the pivot. On many bargain pruners the blade is set at an awkward angle you cannot easily reach, or the whole head is sealed, so touching up the edge is a fumble. If the pruner you are looking at makes sharpening hard, that is a mark against it even if it cuts well the day you buy it, because it will not keep cutting well without that touch-up, and a tool you dread maintaining is a tool you will neglect until it tears.
Rebuildable vs sealed pruners
This is the distinction that, more than price, separates a pruner you keep for years from one you replace every couple of seasons. Ask one question before buying: can I get replacement parts for it?
A rebuildable pruner is designed to come apart. The pivot bolt unscrews, the blade lifts out, the spring is a separate serviceable piece, and the maker sells replacement blades, springs, and sometimes hooks. When the blade eventually wears past sharpening, you buy a new blade for a fraction of the cost of a new pruner and it goes back to cutting like new. When the spring tires and stops popping the handles open, you drop in a new spring. A good rebuildable pruner can be nursed along for a decade or more, and the running cost is a blade every few years plus the odd spring.
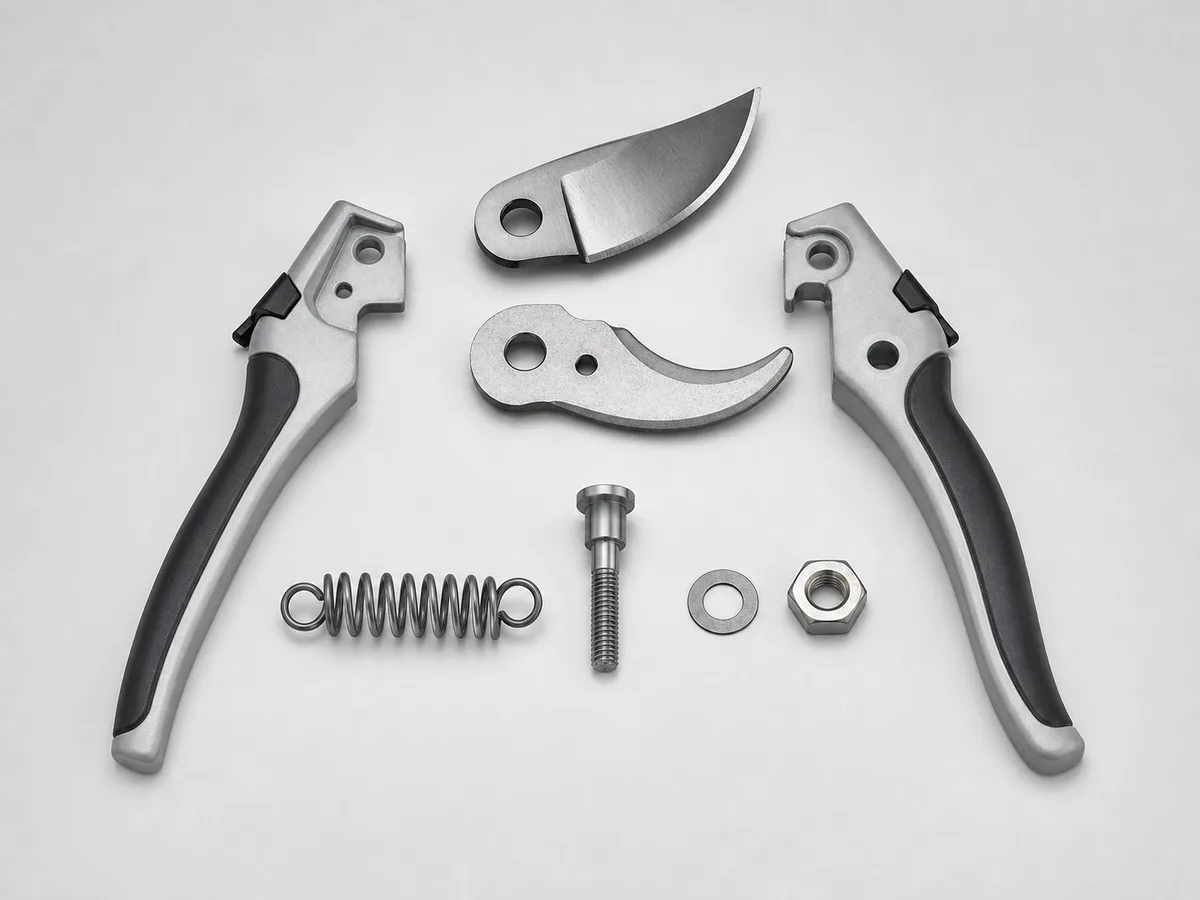 A disassembled pruner showing replaceable spring and blade
A sealed pruner is the opposite. It is riveted or molded so it cannot be taken apart, and no parts are sold for it. When something fails, the whole tool goes in the bin. And here is the specific failure to expect: on cheap sealed pruners, the spring is almost always the first part to die. Those coil or wire springs get fatigued, corrode, or simply launch themselves off into the garden bed, and once the spring is gone the handles no longer open on their own and the tool becomes a chore. On a rebuildable pruner that is a one-minute, few-dollar fix. On a sealed one it is the end of the tool, even though the blade might still have years left in it. Throwing away a good blade because a cheap spring failed is the quiet waste built into bargain pruners.
So when you compare two pruners at similar prices, the one with a published parts list is usually the better long-term buy even if it feels marginally less refined in the store. You are not just buying today's cut; you are buying the ability to keep that cut going cheaply. This is the core of the honest trade-off: a mid-price rebuildable pruner you maintain will outlast a premium pruner you neglect, and it will bury a sealed bargain pair entirely.
Comfort and hand fit
A pruner you cannot close comfortably is a pruner you will fight, and a fought tool gets twisted, over-squeezed, and knocked out of alignment. So hand fit is not a luxury feature; it is part of what keeps the cut clean over a long session. The thing to check is the grip span: how far the handles spread when the pruner is fully open. If the open span is wider than your hand can comfortably wrap and close in one motion, you will never get full leverage, and you will end up rocking the handles to finish cuts, which is exactly the twisting motion that springs blades. Smaller-handed gardeners are better served by a compact model, and some makers offer a smaller-frame version of the same pruner specifically for this. Try to close the pruner before buying, or check whether it comes in more than one size.
Look also at the return spring's feel and the handle material. A spring that is too stiff makes every cut heavier than it needs to be; one that is well matched pushes the handles open just enough without pushing back hard as you cut. Handle coatings that shed water and sap keep the tool from turning slick, which matters because a slipping grip is a grip you clench harder. A latch that you can flick open and closed with the thumb of the same hand holding the tool is a small convenience that pays off across a morning of one-handed work, when the other hand is busy holding the branch.
Where I would spend restraint: the market sells premium ergonomic pruners with rotating handles and grip geometries that sound like they belong on a sports car, and for someone doing hours of production cutting every day they can be worth it. For a normal home garden, they are largely unnecessary. You are paying a premium for a feature designed to solve high-volume repetition that a weekend of pruning simply does not create. A well-fitted standard pair, sized to your hand and kept sharp, does the job without the surcharge. Fit matters; the elaborate mechanisms mostly do not, for most yards.
Cheaper routes and maintenance
Here is the part that saves the most money, because the cheapest good pruner is often the one you already own. Before buying anything, look hard at whether your current pair is genuinely finished or merely neglected. A pruner that tears may just need three things done to it, and none of them costs much.
First, clean the pivot. Sap and dried plant juice build up around the pivot and between the blade and hook, adding drag and holding grit that dulls the edge. Take the pruner apart if it comes apart, or work at the joint if it does not, wipe the blade with a rag and a little solvent or even hot soapy water, and clear the gunk out of the pivot. Half the "dull" pruners I have picked up were just glued with sap. Second, check the pivot tension. If the blade wobbles side to side, the pivot bolt has loosened, and that wobble is your misalignment. Snug the bolt until the blade moves smoothly but without lateral play: tight enough to hold alignment, loose enough that the handles still swing freely. Third, sharpen and oil. File the one beveled edge back to sharp as described earlier, wipe the burr off the flat back, and put a drop of light oil on the pivot and a wipe along the blade to keep rust off. A tired-feeling pruner brought back this way often cuts like new, and you have spent nothing but a few minutes.
If your pruner genuinely cannot be revived (the blade is chipped past filing, the frame is bent, and it is a sealed model with no parts) then the cheaper-and-smarter route on the replacement is a mid-price rebuildable bypass pruner plus a small sharpening file, not a premium pair. That combination costs a good deal less than the top-tier tools and, kept sharp and oiled, will outlast them in your hands. Buy the blade and spring part numbers at the same time if they are cheap, and you have a pruner set up to run for years. The one honest caution on all of this: quality bypass pruners do cost several times what a bargain pair costs, and even the best of them still need the cleaning, sharpening, and occasional part swap above. There is no pruner that cuts clean forever with no attention. The saving is not in avoiding maintenance; it is in buying a tool that makes maintenance cheap and easy instead of impossible.
Matching the pruner to your garden
Pull it together by starting from what you actually grow, because the right pruner is defined by the plants, not by the feature list. This is the same logic behind choosing any garden tool to the job rather than to the marketing, and if you are still assembling the basics, the broader guide to starting a home garden sets out where hand pruners sit among the tools worth owning first.
If your garden is roses, perennials, soft shrubs, and general tidying (the most common home setup) buy a bypass pruner sized to about 3/4 inch, rebuildable, fitted to your hand, and stop there. That single tool covers the overwhelming majority of your cuts cleanly, and the rebuildable design means you maintain it rather than replace it. Add a sharpening file and you have the whole kit. If you also deal with a fair amount of genuinely dead, dry, woody material (clearing out an old hedge, cutting back spent woody stems in bulk) then an anvil pruner as a second tool is worth it for those specific jobs, where its crushing action does not matter and its extra shove helps. And if you keep meeting stems above 3/4 inch, the answer is not a beefier hand pruner but a lopper to sit alongside it, with a pruning saw for anything thicker again.
What you can skip for a normal yard: ratchet pruners, premium rotating-handle ergonomic models, and any sealed bargain pair, however tempting the price. The ratchet and ergonomic tools solve high-volume problems a home garden does not create, and the sealed bargain pair fails at its cheap spring while its blade still has life, which makes it the false economy of the bunch. Spend the money you save on those toward the one good rebuildable bypass pair and its replacement parts.
There is one more piece of the watering-and-tending kit worth thinking about in the same breath, since a clean pruning cut is only part of keeping plants growing well. The companion guide to choosing a garden hose applies the same buy-it-once, maintain-it logic to the tool you will reach for even more often than the pruners. Between the two, the pattern is the same: buy a mid-grade tool built to be serviced, learn the small maintenance it asks for, and it will quietly outlast the flashier thing you were tempted to buy instead. With pruners specifically, the payoff is visible on the plant itself: a clean scissor cut on living wood, made by a sharp bypass blade that still meets its hook exactly, season after season.